Seed packets look small, yet they carry the same kind of practical information a beginner usually searches for in ten different places.
Once you learn to “translate” the packet into plain language, planting becomes calmer, cheaper, and far more predictable.
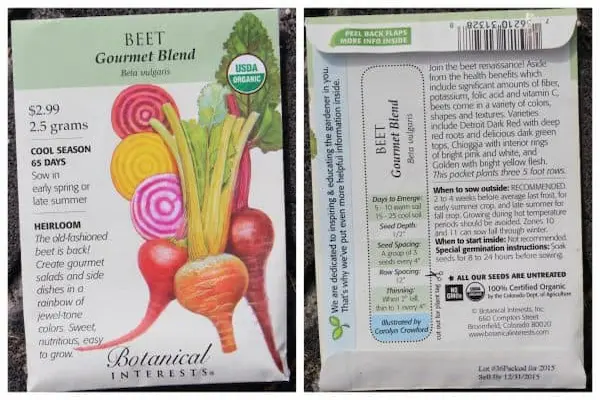
Notice: This content is independent and has no affiliation, sponsorship, or control by any entities mentioned.
How to read seed packets and stop guessing at planting time
A seed packet is a mini instruction manual that tries to fit light, timing, spacing, and harvest expectations into a few lines and symbols.
Confusion happens because brands format that information differently, not because you are “bad at gardening.”
Better results show up when you treat every packet like a checklist, because a checklist turns vague hope into repeatable steps.
Learning gets easier when you focus on the same fields every time, since repetition builds pattern recognition faster than memorizing random icons.
This seed packet guide will walk you through the most common sections, translate the language into everyday choices, and show a few realistic examples you can compare at home.
What you can reliably learn from almost any packet
- Whether the plant prefers full sun or tolerates partial sun.
- Whether you should direct sow outdoors or start indoors and transplant later.
- How deep to plant the seed, plus how far apart plants should end up.
- Rough timing for sprouting and for harvest, often shown as days to germination and days to harvest.
- Season cues, such as “after last frost,” “cool season,” or soil temperature recommendations.
Some packets also include details like expected height, disease resistance, or special notes about trellising, thinning, or succession sowing.
Those extras are helpful, yet the core fields above will already prevent most beginner mistakes.
Seed packet guide to the front panel: what the “pretty side” is really telling you
The front of the packet is designed to catch your eye, though it still carries clues that matter for first-time growers.
Smart choices start before you buy, because the easiest seeds are the ones that match your space and season instead of fighting them.
Crop name versus variety name
The crop name is the category, like lettuce, tomato, basil, or carrot, while the variety name is the specific type within that crop.
Variety matters because it can change size, speed, flavor, heat tolerance, and even how forgiving the plant feels in a container.
For small spaces, compact varieties are often easier, because a plant that stays smaller needs less staking, less pruning, and less emergency problem-solving.
Photos can be helpful, but they can also be a trap
Pictures show the best-case scenario, so treating the photo as inspiration instead of a promise keeps expectations realistic.
Color, size, and “perfection” depend on sun intensity, watering consistency, and harvest timing, which vary across homes and climates.
When the photo looks amazing yet the packet warns “full sun” and your balcony gets only a few hours, choosing a different crop is usually the kinder move.
Words like “early,” “dwarf,” “bush,” and “heat tolerant” are small gold nuggets
“Early” often hints at fewer days to harvest, which helps beginners who want quick wins and faster feedback.
“Dwarf” suggests a shorter plant that can thrive in containers more easily than tall, sprawling types.
“Bush” usually means a compact habit that needs less support, which is why bush beans feel simpler than pole beans for many beginners.
“Heat tolerant” can be a lifesaver in warm regions, because bolting and bitter leaves become much less dramatic when the variety is built for heat.
Planting instructions on the back: the six fields that run your whole season
The back panel looks crowded because it tries to answer the same questions you would ask a helpful neighbor standing next to you in the garden.
Clarity arrives when you read it in a consistent order, because your brain stops panicking and starts recognizing familiar patterns.
Field 1: planting depth
Planting depth is how far below the soil surface the seed should sit, and it matters because seeds need both moisture and oxygen to germinate.
Seeds planted too deep often struggle to reach the surface, while seeds planted too shallow dry out quickly or get displaced by watering.
A practical rule that appears in many gardening books is that smaller seeds usually need shallower planting than larger seeds, which matches how little energy tiny seeds have to push upward.
Depth can be listed in inches, fractions, or millimeters, so slowing down to interpret “1/4 inch” correctly can prevent a full tray of “nothing happened.”
- Very small seeds may be pressed onto the surface or covered lightly.
- Medium seeds often sit around 1/4 to 1/2 inch deep.
- Larger seeds are commonly planted deeper, though the packet’s number is the one to follow.
If you feel unsure, planting a few seeds at two slightly different depths can act like a tiny experiment that teaches you what works in your soil and watering style.
Field 2: spacing
Spacing usually appears in two forms, because plants need room side-to-side and rows need room for airflow and access.
Plant spacing is the final distance between mature plants, not the distance between the seeds you drop at first.
Row spacing is the distance between rows, and it becomes especially important in beds where you need room to weed, water, and harvest without crushing plants.
For containers, spacing still matters, yet the “row” concept may translate into “how many plants fit in this pot without crowding.”
- Too-tight spacing increases disease risk by trapping moisture and reducing airflow.
- Overcrowding also causes smaller harvests, because plants compete for light, water, and nutrients.
- Generous spacing can feel wasteful at first, yet it often produces bigger plants and easier harvesting.
Field 3: days to germination
Days to germination is the expected time window for sprouting, assuming reasonable moisture and appropriate temperature for that crop.
That number is not a countdown timer you can force, because cold soil can slow germination while warm soil can speed it up.
Patience becomes easier when you treat the germination window like “normal range,” because a seed that sprouts a bit late is not necessarily a failure.
Watering style affects germination strongly, since letting the surface dry repeatedly can interrupt the process, especially for small seeds planted shallowly.
Field 4: days to harvest
Days to harvest is one of the most misunderstood lines on any packet, because it can mean different starting points depending on the crop.
Some packets measure from direct sowing outdoors, while others measure from transplanting a seedling into the garden.
Leafy crops can often be harvested at multiple stages, so “days to harvest” might refer to full size even though baby leaves can be cut sooner.
Later in this article, you will get a simple method for turning days to harvest into realistic expectations for your schedule and climate.
Field 5: light requirement
Light is usually shown as full sun, part sun, part shade, or occasionally as “prefers cooler conditions.”
Full sun usually implies several hours of direct sunlight, which fruiting crops often need to produce reliably.
Partial sun can still support many greens, especially when temperatures are high and a little shade keeps leaves tender.
Choosing crops that match your light is one of the biggest “beginner hacks,” because it reduces how many other problems you must solve at the same time.
Field 6: season and timing
Timing cues like “plant after last frost” or “start indoors 6–8 weeks before last frost” are designed to help you align growth with weather reality.
Frost timing matters because many seedlings cannot handle freezing temperatures, while cool-season crops prefer mild weather and can struggle in peak summer heat.
Season language can feel abstract until you connect it to one local reference point, such as typical last frost or your hottest months.
If your area does not experience frost, the same cues can still guide you by pointing to cooler or warmer parts of the year.
Days to harvest decoded: how to turn one number into a realistic plan
Days to harvest can motivate you, yet it can also disappoint you when you expect perfect timing in imperfect conditions.
Accuracy improves when you ask two questions: “From what starting point?” and “Harvested at what size?”
Question 1: is the packet counting from sowing or from transplanting?
When a packet says “start indoors, transplant later,” the days to harvest often assume you are already transplanting a seedling, not starting from a dry seed outdoors.
That detail matters because seedlings might spend weeks indoors before they ever touch the garden bed.
For direct-sow crops, days to harvest is more likely to mean from the day you plant seeds in their final location.
- Tomatoes and peppers often involve indoor starts, which changes how you interpret the clock.
- Radishes and beans are frequently direct sown, so the timeline can feel more straightforward.
- Lettuce can be either, which is why the packet’s wording matters so much.
Question 2: does “harvest” mean baby stage or full maturity?
Leafy greens can be harvested young for tender leaves, then harvested again later as full heads or larger leaves.
Root crops can be harvested small for sweetness or harvested later for size, which changes both texture and timing.
Fruiting crops often have a clearer harvest definition, yet temperature and pollination still influence when fruits actually ripen.
Three realistic reasons your harvest may be earlier or later
- Cooler temperatures often slow growth, so spring and fall gardens can take longer even when plants look healthy.
- Lower light reduces plant energy, which can stretch timelines in balconies or window setups.
- Overcrowding forces competition, often delaying maturity and shrinking the harvest you hoped to get.
A beginner-friendly way to use days to harvest without disappointment
- Write down the packet’s days to harvest number.
- Add a buffer window of roughly one to two weeks for real-life variation, especially in containers.
- Plan an early “taste harvest” date for baby leaves or small roots when that crop allows it.
- Use the buffer as emotional protection, so you stay motivated even if weather slows things down.
This mindset keeps you moving forward, because progress becomes measured by learning and harvesting something, not by hitting an exact calendar date.
Spacing tips that make your garden easier, not harder
Spacing sounds boring, yet spacing is what decides whether plants feel calm and productive or cramped and constantly sick.
Harvest improves when you give plants enough room, because good airflow reduces disease pressure and makes watering more consistent across the bed.
Container gardening benefits even more from spacing, since pot soil holds limited nutrients and limited moisture for each root system.
How to translate spacing into “how many plants fit in my pot?”
Instead of thinking in rows, think in circles of root space, because a pot is basically a small round ecosystem.
One plant that thrives often outperforms three plants that fight each other, especially for fruiting crops like tomatoes and peppers.
When a packet recommends 12 inches between plants, imagine each plant owning a 12-inch bubble, then count how many bubbles can fit without overlapping.
- A wide 12-inch pot often fits one larger plant comfortably, such as a basil plant or a pepper seedling that will grow.
- A long planter can fit multiple greens, because lettuce and arugula often tolerate closer spacing for baby leaf harvest.
- Hanging baskets can work for some herbs, yet they dry quickly, so spacing must account for moisture stress.
Thinning is not cruelty, it is spacing in action
Thinning means removing extra seedlings so the remaining plants have space to become the size the packet assumes.
Many beginners skip thinning because it feels wasteful, yet skipping thinning often leads to tiny, struggling plants that never reach harvest quality.
Edible thinning helps emotionally, because you can eat small greens as micro-harvests instead of viewing them as “lost plants.”
- Plant slightly more seeds than you need, because not every seed sprouts.
- Wait until seedlings have their first true leaves, because that stage makes it easier to select the strongest ones.
- Snip extra seedlings at the soil line rather than pulling, because pulling can disturb roots of the seedlings you keep.
- Follow the packet’s final spacing as closely as your container or bed layout allows.
Row spacing is about access as much as plant health
Rows that are too close make it hard to weed and harvest, which increases frustration and reduces the odds you will keep up with the garden.
Comfort matters because gardening success is often about consistent small actions, and consistent actions require a setup that feels easy to approach.
In raised beds, a “grid” approach can replace rows, yet the packet’s spacing still guides how far apart plants should be in that grid.
Planting depth and moisture: the hidden partnership that controls sprouting
Depth and moisture act like a team, because deeper planting protects moisture while shallow planting improves oxygen and easier emergence.
Packets offer a depth that usually balances those two forces for that crop, which is why following the number is safer than guessing.
How to water after sowing without washing seeds away
Gentle watering is key, because a strong stream can move tiny seeds into clumps, making spacing impossible.
Misting can help at the surface for very shallow seeds, while a slow pour works for deeper seeds as long as it does not create craters.
- Use a watering can with a gentle rose head when possible.
- Water in multiple light passes instead of one aggressive soak.
- Cover the soil lightly with a fine layer of mix if the packet recommends it, because coverage prevents surface drying.
Why “keep moist” does not mean “keep soaked”
Moist means the soil feels like a wrung-out sponge, while soaked means water fills air spaces and pushes oxygen away.
Seeds need oxygen too, so constantly saturated soil can slow germination or cause rot, especially in cooler temperatures.
Checking moisture with a fingertip is more reliable than watering on a timer, because sun and wind change evaporation every day.
Sun icons and light words: a simple visual translation
Seed packets often use symbols to communicate light needs quickly, and those symbols become friendly once you attach a plain-English meaning to each one.
Below is a visual-style legend you can keep in your notes, which helps when you are standing in a store aisle comparing packets.
Light requirement legend
- ☀️ Full sun: Strong direct light for much of the day, especially important for fruiting crops.
- ⛅ Part sun: A mix of direct sun and shade, often enough for many greens and some herbs.
- 🌤️ Part shade: Several hours of sun, often morning sun, with protection from harsh afternoon heat.
- ☁️ Shade tolerant: Limited direct sun, usually better for certain leafy crops than for fruiting vegetables.
Light labels vary across brands, so treating the symbol as a guide rather than a strict promise keeps you flexible and realistic.
Matching the crop to the light you actually have is one of the most powerful beginner vegetables list strategies, because it reduces failure caused by low energy.
Season and “when to plant” explained without stress
Season instructions can feel like a foreign language until you decode the most common phrases and connect them to your yearly weather pattern.
Timing matters because seeds germinate best within certain temperature ranges, and plants grow best when heat and daylight match their biology.
Common timing phrases and what they mean
- “After last frost”: Wait until freezing nights are unlikely, because tender seedlings can be damaged by frost.
- “Before last frost”: Start indoors while it is still cold outside, then transplant when weather becomes safe.
- “Cool season”: Plant when days are mild, because high heat can cause bolting or poor flavor in greens.
- “Warm season”: Plant when soil and nights are warm, because cold conditions slow growth and increase disease risk.
- “Succession sowing”: Plant small batches repeatedly, so you harvest steadily instead of all at once.
Soil temperature notes are more practical than they look
Some packets list soil temperature for germination, and that detail matters because seeds respond more to soil warmth than to air warmth.
Cold soil can stall seeds for days or weeks, which often makes beginners assume the seed is “bad” when the real issue is temperature.
Warm soil can speed sprouting, yet too much heat can also reduce germination for cool-season crops, which is why timing is more than a calendar date.
A simple timing method for beginners with limited time
- Choose one cool-season crop and one warm-season crop that you actually want to eat.
- Plant the cool-season crop in the mild part of your year, then note how quickly it grows in your spot.
- Plant the warm-season crop when nights feel consistently warm, then track its progress weekly.
- Use those observations to adjust the next planting window, because your balcony and microclimate matter.
This approach turns timing from an intimidating rulebook into a learning loop that improves each season.
Planting instructions you might see and how to interpret them correctly
Packets often include extra instructions that look optional, yet many of them exist because that crop has a known “beginner trap.”
Understanding the why behind each instruction makes it easier to follow without feeling controlled by the packet.
“Direct sow” versus “start indoors”
Direct sow means planting seeds where the plant will live until harvest, which is common for fast crops and for plants that dislike root disturbance.
Starting indoors means giving seeds a head start in controlled conditions, which helps slow-growing crops or crops that need a longer season than your outdoor weather offers.
- Root crops often prefer direct sowing, because transplanting can distort roots.
- Tomatoes often benefit from indoor starts, because they grow slowly at first and need a long warm season.
- Many greens can do either, which makes them flexible for beginners.
“Harden off” is a transition step, not a dramatic ritual
Hardening off means gradually introducing indoor seedlings to outdoor sun, wind, and temperature changes, so they do not get shocked.
Skipping hardening off can cause sunscald or stalled growth, which feels mysterious if you do not know the transition matters.
A gentle transition over several days often works, starting with shade and short exposure, then increasing time and brightness.
“Thin to” is the packet begging you to prevent overcrowding
When a packet says “thin to 6 inches,” it means only one seedling should remain every 6 inches in that row or grid.
That line is about final plant spacing, not about how many seeds you should drop initially.
Eating thinnings as baby greens can make thinning feel rewarding rather than wasteful.
“Keep evenly moist” is about consistency, not constant wetness
Even moisture means avoiding extreme swings, because swings create stress that slows growth and invites pests.
Container gardens swing faster than in-ground beds, so evenly moist often requires more frequent checks even when the plant is “low maintenance.”
Mulch and larger containers help stabilize moisture, which reduces how often you must think about watering.
How to read seed packet symbols like a quick visual cheat sheet
Symbol sets vary, yet most of them try to express the same few ideas: light, water, time, and spacing.
Keeping a small symbol legend in your phone notes can save you from buying seeds that do not match your setup.
Common icons and their plain meanings
- 📅 or calendar icon: Planting window, often linked to frost dates or seasons.
- 🌱 sprout icon: Days to germination or a note about germination conditions.
- ⏳ hourglass icon: Days to harvest or time to maturity.
- ↔️ arrows: Spacing between plants or between rows.
- ⬆️ height icon: Expected plant height, which matters for staking and container stability.
- 💧 droplet icon: Water needs, often shown as low, medium, or high.
When an icon feels unclear, look for the matching text, because many packets pair a symbol with a short explanation nearby.
Brands also use symbols for disease resistance or special traits, yet those are bonuses, not the foundation of beginner success.
Examples: three “packet translations” you can copy at home
The examples below are illustrative mockups designed to teach interpretation, not exact reproductions of any specific brand’s packaging.
Use them as practice, because practice makes real packets feel instantly less intimidating.
Example 1: Leaf Lettuce packet translation
Front panel clues: “Leaf lettuce,” “cut-and-come-again,” and a photo showing loose leaves rather than a tight head.
What that implies: Flexible harvesting, faster satisfaction, and higher tolerance for container growing.
- Planting depth: Shallow planting, often around a light cover, because lettuce seeds are small.
- Spacing: Closer spacing can work for baby leaves, while wider spacing supports larger leaves and better airflow.
- Days to germination: A short window in mild temperatures, with slower sprouting in heat.
- Days to harvest: Earlier for baby leaf harvest, later for fuller plants, which means you can start tasting sooner than the full number suggests.
- Sun requirement: Often partial sun to full sun, with shade helpful in hot weather to reduce bitterness.
- Season cue: Typically cool season, which means mild weather brings better texture and less bolting.
Beginner move: Sow a small patch every two weeks, because succession sowing turns one packet into a longer harvest season.
Example 2: Bush Bean packet translation
Front panel clues: “Bush,” “compact,” or “no trellis needed,” often paired with a picture of pods hanging close to the plant.
What that implies: Easier setup, less staking, and a strong option for a simple backyard garden bed or large container.
- Planting depth: Deeper than tiny seeds, because bean seeds are larger and benefit from moisture protection.
- Spacing: Moderate spacing supports airflow, while overly tight spacing can increase mildew risk.
- Days to germination: Often quick in warm soil, while cold soil can stall sprouting noticeably.
- Days to harvest: Usually mid-range, and frequent picking tends to increase total production.
- Sun requirement: Often full sun for best yields, because pods need energy to fill well.
- Season cue: Warm season, meaning planting too early in cold ground can cause poor performance.
Beginner move: Plan to harvest often, because regular picking keeps pods tender and signals the plant to keep producing.
Example 3: Cherry Tomato packet translation
Front panel clues: Words like “indeterminate,” “determinate,” “compact,” or “patio,” which change how big the plant becomes and how you support it.
What that implies: A strong need for sun, support, and patience, yet high reward when the setup matches the crop.
- Planting depth: Shallow for starting seeds indoors, then deeper planting when transplanting seedlings to encourage stronger rooting.
- Spacing: Wide spacing, because tomatoes need airflow, room to branch, and space for light to reach leaves.
- Days to germination: Often faster in warmth, which is why indoor starting can feel more reliable than cold outdoor early starts.
- Days to harvest: Often counted from transplanting, so adding indoor seedling time gives you a more realistic timeline.
- Sun requirement: Strong preference for full sun, because fruit ripening needs high energy.
- Season cue: Plant out after frost risk passes and nights warm up, because cold stress slows growth dramatically.
Beginner move: Choose one tomato plant per large container, because crowding turns tomatoes into constant drama rather than a joyful harvest.
Quick checklist: a fast way to read any packet in under one minute
A quick checklist reduces overthinking, because you stop scanning randomly and start extracting the same key facts every time.
Keeping this list in your notes can turn seed shopping into a confident, calm process.
Shopping checklist
- Confirm the crop and variety, then ask whether it fits your space size and your patience level.
- Check the light requirement, because mismatched sun is the fastest path to disappointment.
- Read the season cue, because timing decides whether the plant thrives or struggles.
- Glance at days to harvest, then remember to add a buffer for real life.
Planting checklist
- Verify planting depth, because depth controls moisture and successful emergence.
- Note spacing, because spacing controls airflow, disease risk, and harvest size.
- Read germination days, then commit to consistent moisture for that window.
- Check whether the crop prefers direct sowing or indoor starting, because the method changes your entire timeline.
After-sprouting checklist
- Thin seedlings if required, because overcrowding quietly ruins harvest potential.
- Adjust watering from “keep moist” to “water when needed,” because roots need oxygen as growth increases.
- Track growth weekly, because notes reveal patterns and prevent repeated mistakes.
- Plan the first harvest stage, because harvesting early can extend production and keep plants tender.
Common beginner misunderstandings and the simple fixes
Many seed failures come from misreading one line on the packet, which is great news because one fix can transform everything.
Instead of blaming yourself, treat each misunderstanding like a small skill you just upgraded.
Mistake 1: planting everything on the same day because you bought the seeds on the same day
Different crops prefer different temperatures, so planting them all at once can cause one to thrive while another stalls.
Following the packet’s season cues creates more wins, even if it means storing some seeds until the right window arrives.
Mistake 2: taking spacing as “seed spacing” instead of “final plant spacing”
Packets expect you to thin, which means initial seeding can be denser, then reduced to the recommended distance as seedlings grow.
Snipping extra seedlings rather than pulling often protects roots of the plants you keep.
Mistake 3: treating days to harvest as a guarantee
Weather, light, and soil quality can stretch or shrink timelines, so using a buffer keeps your motivation stable.
Harvesting at baby stage often shortens the wait, especially for leafy greens and some roots.
Mistake 4: watering like an adult plant when you are still in the germination stage
Germinating seeds need steady moisture near the surface, while established plants prefer deeper, less frequent watering that encourages roots to go down.
Changing your watering approach as the plant grows is a quiet skill that separates frustration from success.
Mistake 5: ignoring the word “thin” because it feels harsh
Thinning is about giving the remaining plants enough light and nutrients to become harvest-worthy.
Eating thinnings as baby greens turns the step into a reward instead of a loss.
Making seed packets feel visual: build your own one-page “translation key”
Seed packets become easier when you create a personal translation key that matches the way your brain likes to see information.
A simple page in a notebook can turn symbol confusion into instant confidence during planting.
A clean template you can copy
- Crop and variety: __________________________
- Direct sow or start indoors: __________________________
- Planting depth: __________________________
- Plant spacing: __________________________
- Row spacing or container plan: __________________________
- Days to germination: __________________________
- Days to harvest: __________________________
- Sun requirement: __________________________
- Season cue: __________________________
- Special notes: __________________________
Filling that template once or twice makes new packets feel familiar, because your eye starts searching for the same data points every time.
Turn packet instructions into a mini calendar without pressure
Calendars help when you treat them as reminders, not as rules you must obey perfectly.
- Write the planting date on your template.
- Add the germination window as a range, not a single day.
- Add an “earliest harvest” window if baby harvesting is possible.
- Add a “likely harvest” window using the packet number plus a buffer.
This method keeps your expectations realistic while still giving you a clear plan that fits a busy life.
How to read seed packets for containers, specifically
Packets are often written with garden beds in mind, so container growers need a small translation step for spacing and watering.
Containers can be easier for beginners because they offer control, yet they also dry out faster, which makes the packet’s moisture guidance more important.
Container translation rules that work for most beginners
- Use the plant spacing as a clue for how many plants fit, because spacing equals root room.
- Choose fewer plants than you think, because one thriving plant beats several stunted ones.
- Expect faster drying, so “keep moist” requires more frequent checks in hot, windy weather.
- Prefer compact varieties when the packet suggests “patio,” “dwarf,” or “bush,” because those labels are often container-friendly.
Spacing examples for common container goals
Leafy greens can be planted a bit closer when you plan to harvest young and often, which is why they fit many low-space setups.
Fruiting vegetables usually need more space and stronger sun, which is why they feel less “low maintenance” unless your conditions match their needs.
- Baby leaf greens: Closer spacing can work, then harvest early to avoid crowding problems.
- Root crops: Respect depth and spacing so roots form well, since crowding creates misshapen harvests.
- Fruiting crops: Give generous space and sturdy support, because productivity depends on plant strength and airflow.
Putting it all together: a 10-step routine for interpreting any packet
Following a routine removes the emotional fog, because you stop wondering what matters and start reading the packet like a friendly set of instructions.
Use these steps as a repeatable process whenever you buy new seeds.
- Read the crop name and variety, then decide whether the plant size fits your space.
- Find the sun requirement, then compare it to your real light, not your wishful light.
- Locate the season cue, then decide whether you are in the right planting window.
- Check whether the crop is direct sow or indoor start, because method changes timing and effort.
- Write down planting depth, because depth controls moisture and emergence success.
- Write down plant spacing, because spacing controls yield and disease risk.
- Write down row spacing or translate it into a container plan, so you can actually implement it.
- Note days to germination, then plan consistent moisture during that exact window.
- Note days to harvest, then add a buffer and an early harvest plan if applicable.
- Capture any special notes like thinning, staking, or succession sowing, because those notes often prevent the crop’s most common beginner problem.
Repeatability is the real secret, because the more often you do this, the faster your brain recognizes patterns across different brands.
Final encouragement: your packet literacy is a gardening superpower
Reading packets well does not require talent, because it is simply a skill of noticing key fields and translating them into actions you can repeat.
When you understand planting instructions, days to harvest, and spacing tips, you spend less money on guesswork and more time enjoying actual growth.
Start with one packet, do the checklist, plant a small container or bed section, and let real results teach you faster than endless scrolling ever could.
Notice: This content is independent and has no affiliation, sponsorship, or control by any entities mentioned.