If pruning makes you nervous, you’re in the majority.
Cutting a living plant can feel like you’re one wrong snip away from disaster.
This beginner guide to pruning plants will calm that fear with clear steps and simple rules.
You’ll learn what to cut, where to cut, when to prune, and how to do it safely without “mutilating” your plant.
Notice: this content is independent and has no affiliation, sponsorship, or control by any institutions, brands, nurseries, or platforms mentioned.
Gardening results vary by species, climate, season, and care, so treat this as practical guidance rather than a guarantee.
Beginner guide to pruning plants: why pruning is not cruel
Pruning is not punishment for plants.
Pruning is communication.
It tells the plant where you want energy to go, like directing traffic at a busy intersection.
Most plants evolved to handle damage from wind, animals, storms, and falling branches.
A clean, thoughtful cut is usually gentler than the random tearing nature would throw at them.
If you’re scared you’ll “kill it,” remember this rule.
Small pruning is like trimming split ends, not amputating a limb.
The confidence trick: start with “no-regret cuts”
The fastest way to feel safe is to begin with cuts that are almost always helpful.
These are dead, broken, diseased, or completely dried stems and leaves.
Removing dead material is like cleaning out a closet.
Nothing living loses space when you take out what is already done.
Pruning basics: the three simple reasons we prune
Pruning can sound technical, but most pruning fits into three beginner-friendly categories.
If you can remember these, you already understand the heart of plant care.
1) Cleanup pruning
Cleanup is removing what is no longer helping the plant.
Dead, damaged, diseased, crossing, or messy growth usually falls here.
- You do cleanup to reduce stress and improve airflow.
- You do cleanup to prevent pests from hiding in dense, weak growth.
- You do cleanup to make the plant easier to water and inspect.
2) Shaping pruning
Shaping is the “haircut” pruning.
You prune to guide a plant into a form that fits your space, like keeping a shrub from blocking a walkway.
- You shape to keep plants balanced and not lopsided toward the light.
- You shape to keep growth where you want it, not where it’s inconvenient.
- You shape to encourage fuller growth instead of long, floppy stems.
3) Training and production pruning
This is pruning for performance.
You prune to improve flowers, fruit, and overall strength, especially in climbing plants, fruiting vegetables, and some shrubs.
- You train to support a structure, like tying a tomato and removing extra growth for airflow.
- You prune to encourage flowering or fruiting where light can reach.
- You prune to prevent weak, overcrowded stems from stealing energy.
Simple pruning tools: what beginners actually need
You do not need a garage full of equipment to prune well.
You need a few tools that cut cleanly and feel safe in your hands.
The beginner tool kit
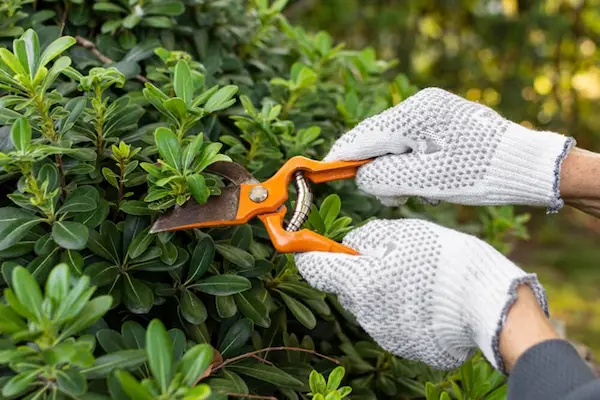
- Bypass hand pruners.These make clean cuts on live stems, like scissors that slide past each other.
- Snips or small scissors.These are perfect for herbs, deadheading flowers, and thin stems.
- Loppers.These are like long-handled pruners for thicker branches you cannot cut comfortably by hand.
- A pruning saw.This is for branches too thick for loppers, and it is safer than forcing a smaller tool.
- Gloves and eye protection.These protect you from thorns, sap, and surprise spring-back branches.
A quick size guide so you don’t fight your tools
Use the smallest tool that makes a clean cut without strain.
If you have to squeeze with your whole body, you’re using the wrong tool for that branch.
- Thin stems and herbs usually need snips or pruners.
- Medium stems and small branches usually need hand pruners or loppers depending on thickness.
- Large branches usually need a saw, not heroic squeezing.
When to prune: the timing rules that keep you out of trouble
Timing is where beginners get stressed, because advice online can sound contradictory.
The secret is that pruning timing depends on what the plant is trying to do next.
The safest universal timing: remove dead and broken anytime
Dead, broken, and clearly diseased material is usually safe to remove whenever you notice it.
Those are “no-regret cuts” that reduce stress and improve plant health in most situations.
The simple flowering rule
If a plant blooms in spring, it often sets flower buds earlier, sometimes on older wood.
If you prune hard before it blooms, you might remove the buds you were waiting for.
If a plant blooms later in summer, it often makes buds on newer growth.
That means pruning earlier in the growing season may still allow it to regrow and bloom well.
- Spring bloomers.A common approach is to prune right after flowering if shaping is needed.
- Summer bloomers.A common approach is to prune in late winter or early spring before strong new growth begins.
If you do not know what kind of bloomer you have, keep it gentle.
Do cleanup now, and save heavy shaping until you identify its bloom timing.
The “don’t create tender growth” caution
Heavy pruning can stimulate fresh, soft new growth.
If you do heavy pruning right before harsh weather, that tender growth can struggle.
This is why many gardeners avoid heavy pruning right before extreme heat, extreme cold, or during drought stress.
Gentle cleanup is fine, but big haircuts should match the plant’s active growth season and your local conditions.
Houseplants have simpler timing
Houseplants aren’t dealing with outdoor winter, so timing is more flexible.
The main rule is to prune when the plant is actively growing and can recover, and to avoid drastic cuts when it is already stressed.
Pruning basics: two cut types you can master in one day
Most beginner pruning becomes easy when you understand two cut styles.
These cuts behave differently, so choosing the right one matters more than being “perfect.”
Thinning cuts
A thinning cut removes a stem or branch back to its point of origin.
This opens the plant, improves airflow, and reduces crowding without creating a lot of new branching at the cut spot.
- Use thinning to remove crossing branches and crowded stems.
- Use thinning to let light into the middle of the plant.
- Use thinning when you want “less plant,” not “more bushy plant.”
Heading cuts
A heading cut shortens a stem by cutting above a bud or leaf node.
This encourages the plant to branch and become fuller near that cut.
- Use heading to make herbs bushier, like basil and mint.
- Use heading to reduce leggy growth and encourage fullness.
- Use heading when you want a plant to “fork” and fill space.
A quick mental shortcut helps here.
Thinning makes space, and heading makes branches.
Where to cut: the “plant anatomy” you only need once
You do not need a botany degree, but you do need two landmarks.
Those landmarks are the bud node and the branch collar.
Bud nodes, explained like a map marker
A bud node is a place where the plant can push out new growth.
It is like a doorway where a new branch can exit later.
When you do a heading cut, you usually cut just above a node so the plant can branch from that area.
Aim for a small gap above the node, not a long stub, and not so close that you nick the node itself.
Branch collars, explained like a “tree shoulder”
When a branch attaches to a larger stem or trunk, there is often a slightly swollen area at the base.
That area is commonly called the branch collar, and it helps the plant seal the wound after a cut.
When you remove a branch, avoid leaving a long stub, because stubs tend to die back and invite problems.
Also avoid cutting flush into the trunk, because that can remove the plant’s natural sealing tissue.
Your goal is a clean removal that respects that attachment zone.
If you are unsure, make a smaller cut and observe before you go bigger.
Beginner guide to pruning plants: a calm step-by-step session
This is the pruning routine that keeps beginners safe and confident.
It is designed to prevent panic-cutting and “oops, I went too far.”
- Step 1: Look first, cut second.Walk around the plant and view it from multiple angles.Notice what looks dead, damaged, crowded, or awkward.
- Step 2: Start with the no-regret cuts.Remove dead leaves, dead stems, and broken branches first.This instantly improves the plant and reduces visual clutter so you can see structure clearly.
- Step 3: Remove obvious conflicts.Cut out crossing branches that rub, because rubbing creates wounds over time.Remove weak, thin stems that are shaded and unlikely to thrive.
- Step 4: Decide your goal in one sentence.Say it out loud if you want, like “I want more airflow,” or “I want it shorter,” or “I want it fuller.”That sentence chooses your cut style, thinning or heading, and stops you from random snipping.
- Step 5: Make a few cuts, then step back.After every few cuts, pause and look again from a distance.This prevents over-pruning caused by being too close to the plant.
- Step 6: Follow the one-third comfort rule.For many plants, beginners should avoid removing more than roughly one-third of the plant at once.If you feel tempted to keep going, stop, water if needed, and revisit later after you see how it responds.
- Step 7: Clean up the mess.Remove cut debris from the soil surface, especially if any material looked diseased.This reduces hiding spots for pests and keeps your plant area tidy and inspectable.
If you do only this routine, you are already pruning like a competent gardener.
The rest is refinement, not survival.
Simple pruning techniques beginners love for common plants
Different plants respond differently, but beginners can succeed fast with a few repeatable moves.
These are high-reward, low-risk actions that build confidence quickly.
Pinching for herbs
Pinching is pruning with your fingertips or snips on soft stems.
It encourages branching, which makes herbs fuller and more productive.
- Pinch basil above a set of leaves to encourage two new shoots.
- Pinch mint to keep it compact and prevent it from getting tall and leggy.
- Pinch flowering herbs if you want more leaf production, because flowering can shift energy away from leaves.
Deadheading for flowers
Deadheading is removing spent flowers.
It can keep some plants looking tidy and encourage continued blooming for certain species.
- Remove faded blooms before they set seed if you want the plant to keep trying to bloom.
- Cut back to a leaf or node rather than leaving a long bare stem when possible.
Light shaping for shrubs
For many shrubs, beginners do best by thinning first and heading second.
Thinning prevents that “meatball” look and lets the shrub keep a natural shape.
- Remove a few crowded branches from inside the shrub to open it up.
- Then shorten a few overly long shoots if needed for size control.
Houseplants: the confidence approach
Houseplants usually respond well to removing yellow leaves, long leggy growth, and damaged stems.
The key is to prune less than you think, then watch recovery in a brighter spot if possible.
- Trim dead leaves at the base where they attach, without tearing the main stem.
- Cut leggy stems back to a node to encourage branching in plants that respond that way.
- Avoid drastic pruning and repotting on the same day if the plant is already stressed.
Personal safety: how to prune without getting hurt
Pruning is a hands-on job, and safety is part of good plant care.
A calm routine keeps both you and the plant in good shape.
Basic safety checklist
- Wear gloves when working with thorny, scratchy, or sappy plants.
- Wear eye protection when cutting anything that can spring back.
- Cut away from your body, and keep your non-cutting hand out of the blade path.
- Use stable footing, and never overreach on a stool or ladder.
- Stop when you feel tired, because fatigue turns careful cuts into sloppy cuts.
When to stop and switch tools
Forcing a tool is how injuries happen.
If a branch is too thick for your pruners, switch to loppers or a saw instead of squeezing harder.
A good cut should feel controlled, not like a wrestling match.
Control is safety, and control is also better for the plant.
Tool care and cleanliness: the quiet secret of good pruning
Dull tools crush stems instead of cutting them cleanly.
Crushed cuts heal slower, look worse, and can invite issues.
Clean tools also reduce the chance of spreading problems from one plant to another.
You do not need to be obsessive, you just need to be consistent.
After every pruning session
- Wipe sap and plant juice off blades, because sticky residue can cause rust and stiffness.
- Brush off soil and debris, especially near hinges and springs.
- Dry tools before storing, because moisture is the fastest route to rust.
- Store tools closed and locked, out of reach of children and pets.
Disinfecting without drama
If you are pruning healthy plants, basic cleaning is often enough for many home gardens.
If you suspect disease, or you are moving from a sick plant to a healthy one, disinfecting is a smart extra step.
- Many gardeners use rubbing alcohol solutions commonly sold for household use, applying it to blades and letting it dry.
- Some gardeners use a diluted bleach solution for disinfecting, then rinse and dry tools to reduce corrosion.
Follow label directions for any product you use, and prioritize safety and ventilation.
Your goal is practical risk reduction, not perfection.
Sharpening basics for beginners
You do not need to become a sharpening expert overnight.
But keeping pruners reasonably sharp makes pruning safer and cleaner.
- Sharpen occasionally, especially if cuts start looking ragged.
- Keep the blade angle consistent, and do a few light passes rather than aggressive grinding.
- If sharpening feels intimidating, a local garden center or tool shop may offer help, depending on your area.
Common pruning mistakes beginners make and how to avoid them
Most pruning mistakes come from either fear or excitement.
Fear makes you avoid pruning until the plant becomes a jungle, and excitement makes you prune too much at once.
Mistake 1: Snipping randomly without a goal
Random snips create random results.
Choose one goal, like “open the center” or “reduce height,” then prune only for that goal.
Mistake 2: Leaving long stubs
Stubs often die back and look messy.
When you shorten a stem, cut closer to a node, leaving a small gap rather than a long bare stick.
Mistake 3: Cutting flush into the main trunk
Cutting too flush can remove the plant’s natural sealing tissue at the attachment point.
Aim for a clean removal that respects the base area where the branch connects.
Mistake 4: Doing a massive haircut in one session
A plant can be stressed by losing too much leaf area at once, especially in hot weather.
Beginner-friendly pruning is often better spread across time, like two small haircuts instead of one shock makeover.
Mistake 5: Pruning at the wrong time for blooms
Heavy pruning right before flowering can reduce blooms for some plants.
If flowers are your main goal, learn whether the plant blooms on older growth or new growth, and prune accordingly.
Mistake 6: Using dull or dirty tools
Dull tools increase effort, reduce control, and damage stems.
Clean, sharp tools make pruning easier, safer, and healthier for the plant.
When to prune: a gentle cheat sheet for beginners
This is not a strict calendar, because climate varies by region.
It is a “most often true” guide to help you avoid the biggest timing mistakes.
- Anytime:Remove dead, broken, or clearly unhealthy material, and remove spent flowers if you want a tidier look.
- During active growth:Light shaping, pinching herbs, and correcting leggy growth usually works well when the plant can regrow.
- After spring bloom:Many spring-flowering shrubs can be lightly shaped after they finish blooming if needed.
- Late winter to early spring:Many plants tolerate bigger structural pruning before strong new growth begins, especially when blooms form on new growth later.
- Times to be cautious:Avoid heavy pruning during extreme heat, drought stress, or right before harsh cold when new tender growth would struggle.
If you are unsure, choose the safest action.
Do cleanup now, and postpone heavy shaping until you identify the plant and its bloom behavior.
Beginner guide to pruning plants: a simple “decision tree”
When you’re staring at a plant with scissors in your hand, decisions can feel overwhelming.
Use this quick decision tree to stay calm and correct.
- Is it dead, broken, or clearly unhealthy.If yes, remove it cleanly and move on.
- Is it rubbing or crossing another branch.If yes, remove the weaker or more awkward one to prevent damage.
- Is the plant too dense in the center.If yes, thin a few stems to open airflow and light.
- Is the plant too tall or too wide for its space.If yes, do a small amount of heading or selective thinning, then step back and reassess.
- Are you about to cut because you feel anxious or impatient.If yes, pause, walk away, and return in ten minutes with a clearer goal.
This decision tree keeps pruning grounded in logic, not emotion.
And that is exactly how you avoid the “I panicked and cut everything” moment.
Quick FAQ: the questions beginners ask most
Can pruning kill a plant
Small, sensible pruning usually does not kill healthy plants.
The bigger risks are removing too much at once, cutting with dull tools, or pruning a severely stressed plant during extreme conditions.
Should I seal cuts with paint or wound paste
Most home gardeners do not need to seal typical pruning cuts on most plants.
Clean cuts and good plant care are usually more important than coatings for everyday pruning.
How much can I prune at once
A common beginner comfort rule is to avoid removing more than about one-third of the plant in one session.
If a plant needs major renovation, it is often safer to do it in stages rather than all at once.
Why does my plant look worse right after pruning
Pruning is a temporary “messy haircut” before it becomes a better shape.
Many plants respond with fresh growth over the next weeks, especially during active growing season.
What if I cut the wrong thing
It happens, even to experienced gardeners.
Plants are resilient, and most mistakes become learning moments rather than disasters, especially if the rest of care is consistent.
Wrap-up: pruning is a skill you grow into
Pruning feels scary until it feels normal.
The shift happens when you stop thinking of pruning as “harm” and start seeing it as “guidance.”
Start with no-regret cuts, use clean sharp tools, and make a few cuts at a time with a clear goal.
With each session, your fear drops, your plant looks better, and pruning turns into one of the most satisfying parts of plant care.