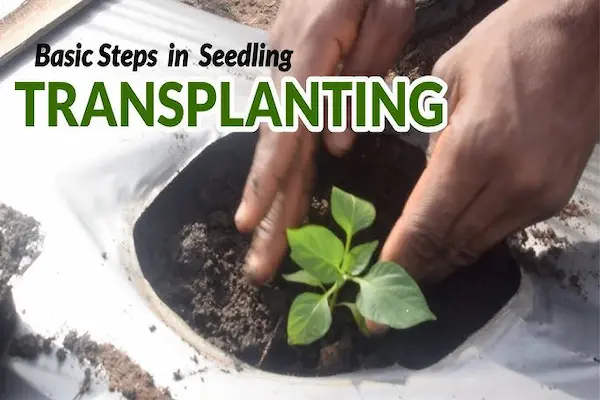
Transplanting a seedling can feel nerve-racking because you are moving a living thing from its safe little world into a bigger, harsher one.
Gentle handling, smart timing, and a simple sequence can reduce shock so much that your plants barely notice the change, and you will feel calmer too.
Notice: this content is independent and has no affiliation, sponsorship, or control over any nurseries, brands, institutions, labs, or third-party platforms mentioned.
Transplanting Seedlings Step by Step: What “Transplant Shock” Really Means
Transplant shock is not a mysterious curse, since it is usually a predictable combination of root disturbance, sudden sun and wind exposure, and moisture swings that stress the plant’s internal plumbing.
Roots are the plant’s drinking straws and anchor points at the same time, so anything that tears them, dries them, or leaves air gaps around them can trigger drooping even when the soil looks wet.
Leaf stress often shows up first because leaves lose water faster than roots can replace it after a move, especially on bright or windy days when evaporation ramps up quickly.
Temperature differences add another layer, because a seedling raised in stable conditions can struggle when nights get colder or midday heat spikes without warning.
Nutrition problems are usually not the first issue after transplant, since most newly moved seedlings simply need stable moisture, gentle light transition, and time to reconnect roots to their new soil.
- Root disturbance creates temporary water shortages, because tiny feeder roots are easy to damage and they do most of the actual water uptake.
- Sudden sun exposure causes leaf scorch and rapid drying, because indoor or sheltered leaves have not built the protective “sun-tough” tissue yet.
- Wind increases transpiration and can snap tender stems, because seedlings are often softer than mature plants and their support fibers are still developing.
- Cold soil slows root growth even when air feels pleasant, because many warm-season plants hate pushing roots in chilly ground.
- Overwatering after transplant can backfire, because constantly soggy soil reduces oxygen and slows root recovery when the plant needs oxygen to rebuild.
Before You Touch the Plant: A Calm Preparation Checklist
Preparation reduces stress more than speed, because most transplant mistakes happen when you rush and improvise with dry soil, missing tools, and a seedling sitting in the sun.
A short checklist keeps you moving in the right order, so your hands stay gentle and your decisions stay simple even if you feel excited or nervous.
Quick prep checklist for transplant seedlings
- Water the seedling a few hours before moving it, because a hydrated root ball slides out more cleanly and resists crumbling.
- Moisten the new potting mix or garden bed lightly ahead of time, because planting into bone-dry soil creates immediate stress that looks like “shock.”
- Choose a mild weather window when possible, because cloudy skies or calm evenings make the transition far easier on leaves.
- Set up shade or wind protection if conditions are harsh, because temporary shelter can prevent a setback during the first two or three days.
- Label your plants before they move, because confusion later can lead to spacing mistakes and mismatched care.
Pick the best time of day for moving to garden or pots
Late afternoon or early evening is often ideal, because sunlight is weaker, air is cooler, and the seedling gets a full night to settle before facing the next bright day.
Morning can work well too when the day will stay mild, because the plant can begin rooting right away without the sudden heat stress that often arrives later.
Midday transplanting is the hardest option, because hot sun and wind can overwhelm a plant that has not reconnected its roots to the surrounding soil yet.
- Check the forecast for strong wind, heavy rain, or extreme heat, because those conditions increase stress and can undo careful root work.
- Choose a day when you can monitor moisture afterward, because “plant and forget” is rarely kind during the first week.
- Plan for a slow pace, because gentle handling matters more than finishing quickly.
Gather a simple set of tools so you do not improvise
Tools do not need to be fancy, since a trowel, a watering can, and a small tray to hold pots can solve most problems while keeping your workspace tidy.
- A trowel or small shovel helps you create a proper planting hole, because squeezing a seedling into a tight gap often damages roots.
- A watering can with a gentle flow prevents soil washout, because harsh streams can expose roots and topple tender stems.
- Clean scissors can be useful for trimming torn leaves, because damaged foliage can rot or invite pests when it stays pressed against wet soil.
- Mulch or leaf litter helps stabilize moisture, because the first week is easier when the soil surface does not bake and crust.
- Stakes or simple supports protect tall seedlings, because a single windy afternoon can bend stems before roots anchor properly.
Hardening Off: The Gentle Bridge From Protected Conditions to Real Weather
Hardening off is the process of training seedlings to handle brighter light, wider temperature swings, and moving air, so the transplant feels like a smooth step rather than a sudden shove.
Skipping this transition is one of the main reasons store-bought or indoor-grown seedlings flop, because their leaves and stems are not yet prepared for outdoor intensity.
Most gardens benefit from a gradual schedule over about a week or two, because slow exposure gives the plant time to thicken leaf tissue and strengthen stem fibers.
- Start with shade or dappled light, because direct midday sun can scorch tender leaves in a single session.
- Increase exposure time gradually, because a seedling can adapt to a little stress when it arrives in small, predictable doses.
- Introduce gentle wind slowly, because constant movement helps stems strengthen but strong gusts can snap a plant that is still soft.
- Watch nighttime temperatures, because warm-season plants often struggle when nights are too cold even if daytime feels comfortable.
A simple hardening off schedule you can follow without overthinking
- Place seedlings outdoors in bright shade for 30 to 60 minutes on the first day, because short exposure reduces shock while still beginning the training.
- Extend time outdoors daily, because steady progression is more effective than one long session followed by several missed days.
- Add early morning sun before you add afternoon sun, because morning light is usually less intense and easier for leaves to tolerate.
- Bring seedlings inside or to shelter if wind becomes strong, because “toughening up” should not mean damage.
- Leave seedlings outside overnight only when temperatures suit the crop, because cold stress can slow rooting and delay growth after transplant.
Consistency matters more than perfection, because the goal is simply to avoid the most extreme jump from indoors to outdoors, not to follow a rigid plan with zero flexibility.
Transplanting Seedlings Step by Step for Pots and Containers
Moving a seedling into a larger pot is often easier than moving into the ground, because you control the soil texture, drainage, and moisture more precisely.
Containers also help beginners practice root handling, since you can see the root ball, adjust placement, and correct mistakes without fighting heavy garden soil.
Choose the right container without creating new problems
Drainage holes are essential because standing water suffocates roots, so any pot you use should allow excess water to escape freely.
Pot size should be a gentle step up, because an enormous pot holds moisture for a long time and can stay too wet for a small root system.
- Select a pot that is only a little wider than the current root ball, because the plant can colonize that space quickly and stay balanced.
- Use a saucer or tray only when you can empty it, because roots sitting in runoff water can rot surprisingly fast.
- Favor sturdy pots that do not tip easily, because top-heavy seedlings can lean and grow crooked if the container wobbles.
Step-by-step: transplant seedlings into a bigger pot
- Pre-moisten your potting mix until it feels like a wrung-out sponge, because evenly damp mix settles gently around roots without compressing into a brick.
- Fill the new pot partway and make a shallow space for the root ball, because you want the seedling to sit at the right height without forcing it down.
- Hold the seedling by a leaf or the root ball edge, because stems bruise easily and a bruised stem can become a weak point later.
- Slide the plant out by tipping the old container and pressing the sides, because pulling upward often tears roots and snaps tender growth.
- Inspect roots briefly and loosen circling roots gently, because roots that keep circling can continue the pattern and limit future growth.
- Set the seedling into the new pot at the same depth for most plants, because burying stems too deeply can cause rot in species that dislike it.
- Backfill around the root ball and press lightly, because firm contact removes air pockets while heavy packing destroys the tiny pore spaces roots need.
- Water slowly until moisture runs through, because a full initial watering helps soil settle naturally and confirms that drainage is working.
- Avoid adding gravel layers at the bottom, because drainage usually improves more from good soil structure and a clear hole than from mixed layers.
- Keep newly potted seedlings out of harsh midday sun for a day or two, because roots need time to explore the fresh mix before leaves demand peak performance.
- Rotate pots occasionally under lights or near windows, because even small light differences can cause leaning and uneven growth.
Moving to Garden Beds: How to Plant Without Crushing Roots or Confidence
Garden transplanting adds extra variables like soil temperature, wind, and uneven moisture, so a steady sequence helps you control what you can while accepting what you cannot.
Most seedlings do best when the planting hole is ready before the plant leaves its container, because exposed roots and hot sun are a stressful combination.
Prepare the bed so the seedling meets a welcoming root zone
Weeds compete aggressively with young transplants, so clearing and loosening a small area around each planting spot gives your seedling a fair start.
Soil that is slightly moist is easier to work and kinder to roots, so watering the bed the day before can make planting smoother when conditions are dry.
- Loosen soil in the top layer where roots will grow first, because compacted soil can block early expansion and delay establishment.
- Break up large clods gently, because big chunks leave air gaps that dry roots and reduce contact.
- Mix in compost if your soil is poor, because modest organic matter can improve structure and moisture stability without overwhelming the seedling.
- Skip strong fertilizers in the hole, because concentrated salts can burn tender roots that are already adjusting.
Step-by-step: moving to garden with clean root care
- Dig the hole slightly wider than the root ball, because roots expand outward more easily when surrounding soil is loosened and crumbly.
- Match hole depth to the root ball height for most plants, because planting too deep can suffocate stems while planting too shallow can expose roots.
- Set the seedling nearby in shade while you work, because a few minutes in direct sun can dry small containers quickly.
- Remove the seedling from its container gently, because a stable root ball keeps fine roots intact and reduces stress immediately.
- Place the plant into the hole and check level, because correcting depth early prevents you from lifting and re-settling roots repeatedly.
- Backfill halfway and water lightly, because water helps soil flow into small gaps around roots without heavy tamping.
- Finish backfilling and press gently around the base, because good contact supports steady moisture while still leaving pore space for oxygen.
- Water again with a calm, slow pour, because a thorough initial soak encourages roots to explore beyond the original root ball.
- Apply mulch around the plant while keeping it off the stem, because mulch stabilizes moisture and temperature but wet mulch against stems can cause rot.
- Plant on cloudy days when possible, because lower light reduces water loss from leaves during the critical first hours.
- Shield transplants from strong wind temporarily, because wind can pull moisture from leaves faster than roots can respond.
- Space plants as recommended for the crop, because tight spacing reduces airflow and increases disease pressure later in the season.
Root Care: Handling Root Balls, Root-Bound Plants, and Delicate Seedlings
Root care is the heart of transplant success, because a seedling that keeps most of its fine roots intact can drink, recover, and grow even if the weather is not perfect.
Root-bound plants are common with store-bought starts, since seedlings often sit in small cells too long while they wait for a buyer, and that delay can create tight spirals of roots.
Delicate-root plants, on the other hand, can resent disturbance, so the best approach is often minimal handling plus excellent moisture control afterward.
How to recognize a root-bound seedling quickly
- Roots circling the bottom or visible through drainage holes suggest the plant has been in the container too long, especially if the root mass looks like a tight mat.
- Water running straight through without soaking can indicate a dense root ball, because roots can repel water and leave the center dry.
- Stunted top growth with frequent wilting can happen when roots have no space, because the plant cannot build a larger “drinking system.”
Gentle fixes for circling roots without ripping everything apart
- Loosen the outer roots with your fingers first, because a gentle tease can redirect growth without significant damage.
- Massage the bottom edge of the root ball lightly, because many circling roots are concentrated there and respond well to small disturbances.
- Make a few shallow vertical scratches on very tight root balls if teasing fails, because light scoring can encourage outward rooting once planted.
- Keep roots damp during handling, because even short drying periods can kill fine root hairs that the plant needs immediately.
- Plant promptly after loosening, because leaving a disturbed root ball sitting in air increases stress quickly.
- Severe root binding sometimes requires firmer correction, yet careful timing and excellent aftercare can still lead to strong recovery.
- Soft, white roots usually indicate healthy growth, while dark mushy roots can suggest overwatering or rot that needs a change in moisture habits.
- Broken roots are not always fatal, because plants can regrow roots, although avoiding damage is still the most comfortable path.
Special note on peat pots and biodegradable containers
Biodegradable pots can be convenient, yet they sometimes dry out quickly or resist breaking down, so root contact with surrounding soil becomes the key factor to watch.
- Tear away any exposed rim above soil level, because an above-ground rim can wick moisture and create a dry ring around the root zone.
- Open the bottom slightly if it feels stiff, because roots need a clear exit path to expand into the surrounding soil.
- Plant the entire pot only when it stays fully buried, because exposed material can draw moisture away and slow establishment.
Hardening Off Meets Transplant Day: A Smooth “Last 24 Hours” Plan
The final day before planting is a good moment to reduce surprises, because small details like hydration, shade, and soil readiness determine whether your seedling glides into place or struggles.
A simple last-day routine keeps the plant hydrated without leaving it waterlogged, and it keeps you organized so nothing sits forgotten in the sun.
- Water seedlings earlier in the day, because roots move more safely when the root ball is moist but not dripping.
- Set tools and mulch near the bed, because walking back and forth while holding seedlings increases the chance of drops and delays.
- Double-check spacing, because moving plants again after they are planted disturbs roots and resets recovery time.
- Plan a gentle watering approach, because blasting soil can expose roots while under-watering leaves the root ball partly dry.
Transplanting Seedlings Step by Step: Planting Depth, Stem Safety, and Firmness
Planting depth feels simple until you learn that different plants prefer different rules, because some stems can form roots while others rot if buried too deeply.
Firmness matters too, since a seedling needs stable contact with soil, yet aggressive tamping destroys pore spaces and can create a compacted mini-bowl around the root zone.
Depth guidelines that keep most beginners safe
- Plant most seedlings at the same depth they were growing in the container, because that depth matches the plant’s stem tolerance and oxygen needs.
- Bury tomatoes deeper if you want stronger rooting, because tomatoes can form roots along buried stems and often benefit from the extra support.
- Keep crowns of herbs and many ornamentals at the original level, because burying the crown can trap moisture and lead to rot.
- Avoid planting too high, because exposed root shoulders can dry quickly and slow establishment.
How firm should the soil be around a new transplant
Gentle pressure is enough when soil is moist, because water will settle particles into contact without needing heavy packing that blocks oxygen.
Air gaps are the enemy, yet crushed soil is also a problem, so aim for steady contact that still feels springy rather than dense.
- Press lightly around the perimeter of the root ball, because you want to eliminate pockets without squeezing the center.
- Water and then check again, because water reveals whether the plant sinks, tilts, or exposes roots after settling.
- Add a little soil if the plant drops too low, because correcting early is easier than lifting later once roots start to attach.
First Week Care: The Simple Routine That Prevents Most Setbacks
The first week is when roots decide whether the new home feels safe, so consistent moisture and protection from extremes matter more than fast growth.
Watering should respond to soil and weather rather than the calendar, because a cool cloudy week needs less water than a hot windy week even for the same plant.
Overwatering is a common mistake after transplanting, because worried gardeners often keep soil soggy, and soggy soil reduces oxygen just when roots need oxygen to heal.
A first-week checklist you can print mentally
- Check moisture daily by feeling soil an inch or two down, because the surface can look dry while the root zone stays wet.
- Water slowly and deeply when needed, because shallow sprinkles encourage surface roots and do not support stable establishment.
- Provide temporary shade if leaves droop in strong sun, because a short shelter period can prevent dehydration while roots reconnect.
- Keep mulch a small distance from stems, because constant wet contact at the stem base can invite rot and pests.
- Delay heavy feeding for a bit, because a plant that is still repairing roots often responds better to steady moisture than to extra nutrients.
A calm day-by-day approach for the first seven days
- Day 1: water thoroughly after planting, then observe leaf posture, because early droop can simply be adjustment and not a crisis.
- Day 2: check soil moisture and add shade if sun is harsh, because reducing evaporation helps the plant “catch up” with water demand.
- Day 3: look for new leaf firmness in the morning, because improved turgor suggests roots are regaining function.
- Day 4: remove some shade gradually if conditions are mild, because plants need light to grow, yet they need it in manageable doses.
- Day 5: confirm the plant is not sinking or leaning, because loose soil settling can change depth and expose stems or roots.
- Day 6: watch for pests that target stressed plants, because a slightly weak transplant can attract opportunistic chewing and sap-sucking insects.
- Day 7: evaluate overall trend rather than a single leaf, because one damaged leaf is normal while a downward trend signals something to adjust.
Troubleshooting After You Transplant: Quick Diagnoses That Reduce Panic
Symptoms after transplant often look dramatic, yet many seedlings recover if you respond to the most likely causes first and resist the urge to throw five fixes at once.
Observation beats guesswork, because soil moisture, sun intensity, and wind exposure usually explain more than fertilizer in the earliest days.
Drooping leaves
- Temporary droop during the hottest part of the day can be normal, because many plants conserve water by relaxing leaf posture in strong heat.
- Persistent droop morning and evening often means water stress, because roots are not delivering enough moisture to keep leaves firm.
- Wet soil with droop can mean low oxygen, because saturated roots cannot breathe well enough to function normally.
- Check root-zone moisture first, because the correct response differs completely between dry soil and soggy soil.
- Add temporary shade or wind protection if conditions are intense, because reducing demand is often easier than forcing supply.
- Water deeply only when soil is actually drying, because repeated shallow watering can keep the surface wet while the deeper zone remains inconsistent.
Yellowing leaves
- Lower leaves yellowing right after transplant can be stress-related, because plants sometimes sacrifice older leaves while they rebuild roots.
- Widespread yellowing plus wet soil often suggests overwatering, because oxygen shortage can mimic nutrient deficiency.
- Pale new growth after a week or two can suggest mild hunger, because rapidly growing seedlings eventually need nutrition once they are established.
- Stabilize watering before adding fertilizer, because nutrients do not help a root system that cannot breathe.
- Wait for signs of new growth, because feeding is most useful when roots are active and ready to take up nutrients.
- Use gentle feeding if needed, because harsh doses can burn tender roots and extend recovery time.
Leaf scorch or white patches
- Sunscald looks like bleached or crispy areas, because indoor leaves are not yet adapted to full sun intensity.
- Wind burn can add browning edges, because rapid evaporation damages leaf tissue faster than roots can replace moisture.
- Add shade for a few days, because protection gives leaves time to toughen while roots expand.
- Reintroduce sun gradually, because hardening off continues even after transplant when you manage exposure wisely.
- Keep soil evenly moist, because stressed leaves recover faster when roots can supply steady water.
Stalled growth
- A pause after transplant is common, because plants often spend energy on roots first before pushing new leaves.
- Cold soil can prolong the pause, because roots grow slowly when temperatures are not suitable for the crop.
- Root binding can also cause a stall, because circling roots may not explore outward unless corrected.
- Check whether the crop is warm-season or cool-season, because planting warm-season seedlings into cold ground often creates weeks of slow progress.
- Confirm the plant is not sitting in compacted or waterlogged soil, because poor aeration keeps roots from expanding.
- Be patient once conditions are corrected, because plants often resume growth suddenly after the root system reconnects.
Store-Bought Seedlings: What to Check Before You Even Plant Them
Nursery starts can be fantastic, yet they sometimes come with hidden stress from tight cells, inconsistent watering, or sudden transport, so a quick inspection protects your time and your garden space.
Healthy seedlings usually have sturdy stems, balanced leaf color, and a root ball that holds together without being a tangled knot, which makes transplanting much more forgiving.
- Look for thick stems rather than tall, skinny ones, because sturdy stems handle wind and transplant handling better.
- Check leaf undersides for pests, because stressed seedlings can carry insects that spread quickly once planted.
- Inspect the soil moisture in the pot, because bone-dry or soaking-wet starts often need a day of stabilization before planting.
- Peek at the roots if possible, because a severely root-bound plant may need gentle loosening to succeed.
- Prefer plants without many flowers yet, because early flowering can divert energy away from root establishment.
A short “stabilize at home” routine for new nursery plants
- Place the seedlings in bright shade for the first day, because transport stress plus full sun can be too much all at once.
- Water to even moisture if pots are dry, because consistent hydration makes the eventual transplant gentler.
- Begin hardening off if they were grown in a protected greenhouse, because greenhouse light is often softer than outdoor sun.
- Transplant after they look perky and stable, because planting an already wilted seedling stacks stress on stress.
Special Cases: Tomatoes, Peppers, Leafy Greens, and Sensitive Roots
Different plants tolerate different handling, so knowing a few common categories helps you decide when to loosen roots, when to keep the root ball intact, and when to plant deeper.
Tomatoes
- Deeper planting can strengthen tomatoes, because buried stems can form additional roots and improve stability.
- Staking early prevents root disturbance later, because adding supports after planting can damage roots that are already spreading.
- Steady moisture matters, because rapid drying and soaking cycles can stress plants and encourage blossom issues later on.
Peppers and eggplants
- Warm soil is critical, because these plants often sulk in cool ground even when the air feels mild.
- Gentle handling helps, because stems can be brittle and root recovery can be slower compared to faster-growing crops.
- Consistent light after planting supports recovery, because shaded pepper plants can stall and take longer to regain momentum.
Leafy greens and brassicas
- Cooler conditions are usually fine, because many leafy crops tolerate mild chill better than warm-season seedlings.
- Moisture balance prevents bitterness and stress, because leafy plants respond quickly to drying and can bolt sooner when stressed.
- Row cover or light protection can help early, because wind and pests often hit tender leaves before roots fully anchor.
Cucumbers, squash, and other sensitive-root seedlings
- Minimal root disturbance is best, because many cucurbit seedlings dislike handling and can stall if roots are teased aggressively.
- Plant promptly after removing from the pot, because exposed roots dry quickly and these plants often respond poorly to delays.
- Choose a warm, sheltered window for planting, because cold nights can set these plants back noticeably.
Transplanting Seedlings Step by Step: A One-Page Sequence You Can Follow Every Time
Repeating the same sequence builds confidence, because your hands learn what “gentle pressure” and “good soil contact” feel like, and your mind stops racing with too many options.
- Pick a mild time window, ideally cloudy or late day, because lower stress conditions improve success immediately.
- Hydrate the seedling and moisten the planting area, because roots move best when everything is evenly damp rather than dusty or muddy.
- Prepare the hole or new pot before removing the plant, because roots should not sit exposed while you dig and search for tools.
- Remove the seedling carefully, holding leaves or the root ball edge, because stems are fragile and do not like pressure.
- Address root binding gently if needed, because outward rooting is the goal while keeping fine roots intact is the priority.
- Place at proper depth and backfill with light pressure, because air gaps dry roots and heavy tamping blocks oxygen.
- Water slowly, let soil settle, and correct tilt, because a stable plant anchors sooner and experiences less movement stress.
- Mulch and protect from extremes briefly, because the first days are about root recovery rather than rapid top growth.
- Monitor moisture daily for a week, because small adjustments early prevent the big failures that feel “sudden.”
- One change at a time is best, because diagnosing problems becomes nearly impossible when you adjust water, light, fertilizer, and pruning all at once.
- Patience is part of the process, because many seedlings pause above ground while doing the important work of rebuilding roots below ground.
- Notes help more than perfect memory, because writing down planting date, weather, and first-week observations teaches you patterns that improve every future transplant.
When Professional Guidance Makes Sense
Some transplant failures are driven by deeper issues like poor drainage, persistent pests, or soil problems that basic home adjustments cannot fully solve, so outside guidance can save time and disappointment.
Local garden professionals, extension-style resources, or soil testing services can be helpful when plants repeatedly fail in the same spot, because repeated patterns often signal a site problem rather than a technique problem.
Notice: this content is independent and has no affiliation, sponsorship, or control over any nurseries, institutions, labs, or third-party services that may offer advice or testing.
- Repeated wilting in one bed despite correct watering can suggest drainage or compaction issues, because roots may lack oxygen even when moisture seems adequate.
- Sudden collapse of multiple seedlings can suggest disease pressure, because some pathogens spread quickly in stressed, wet conditions.
- Unexplained nutrient symptoms across seasons can suggest pH or imbalance, because availability can be limited even when fertilizer is present.
- Concerns about unknown soil history deserve serious attention, because peace of mind is valuable when you are growing food crops.
Final Encouragement: Confidence Comes From Sequence, Not Perfection
Skillful transplanting is mostly about doing a few small things in the right order, because roots respond best to calm hands, prepared soil, and consistent first-week care.
Success becomes easier each time you transplant seedlings step by step, because the plant teaches you what it likes through posture, color, and recovery speed, and those cues get clearer with practice.