Diagnose common indoor plant problems like yellow leaves, drooping, and pests, then try gentle fixes and know when to seek help.
Common indoor plant problems: how to diagnose without spiraling
Confidence starts when you treat plant care like simple observation rather than a personality test, because the plant is giving clues and you are just learning how to read them.
Multiple symptoms can share the same cause, and one symptom can have multiple causes, so the goal is narrowing possibilities instead of hunting a single perfect answer.
Small, reversible changes are the safest first step, because dramatic fixes like repotting, heavy pruning, or strong feeding can increase stress when roots are already struggling.
The calm “one-change rule” that prevents most beginner mistakes
- Choose one likely cause based on what you see and what you recently did, then change only that variable for several days.
- Track whether the plant stops getting worse, because “stability” is often the first sign of recovery.
- Add the next adjustment only after the first change has a clear outcome, because stacking changes makes diagnosis impossible.
A quick pre-check list before you troubleshoot anything else
- Confirm the pot has drainage holes, because trapped water creates root stress that mimics many other problems.
- Check soil moisture a couple inches down, because a dry surface can hide a wet root zone and a wet surface can hide a dry core.
- Look for drafts from vents, heaters, fans, and doors, because air movement can dry leaves and confuse watering cues.
- Inspect leaf undersides and stem joints, because plant pests prefer hidden spots and multiply quietly.
- Remember your last watering and fertilizing, because timing often connects symptoms to actions.
How to “read” symptoms the way plants actually show stress
Older leaves turning ugly first often points to a resource issue, because the plant will sacrifice older foliage to protect newer growth when energy is limited.
New growth looking wrong first often suggests an active constraint, such as pests at the growing tip, low nutrients, or environmental stress that prevents proper leaf formation.
Localized damage usually hints at light scorch, cold drafts, or a pest cluster, while whole-plant decline tends to trace back to roots, watering rhythm, or severe light mismatch.
Three questions that narrow the cause surprisingly fast
- Where did the symptom begin, on old leaves, new leaves, or one side facing a window or vent?
- How quickly did it appear, slowly over weeks or suddenly over days?
- What changed recently, including seasons, heater use, a new spot by the window, or a well-intended extra watering?
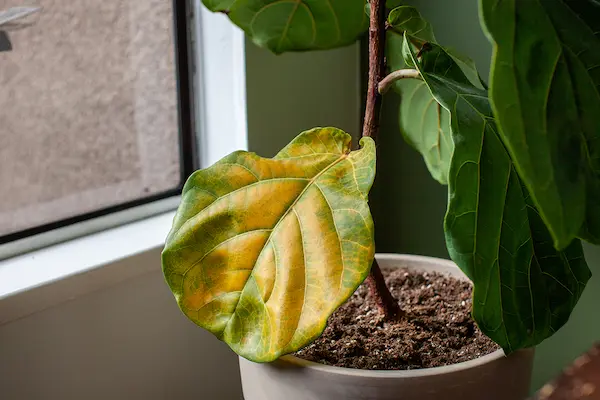
Yellow leaves indoor: what yellowing usually means, and what it rarely means
Yellow leaves indoor can be normal aging when only one or two older leaves fade slowly, because many plants routinely shed the lowest leaves as they grow upward.
Fast or widespread yellowing is more often a care mismatch, and overwatering combined with low light is the most common beginner combo in apartments.
Panic-watering a yellow plant is a common reflex, yet yellowing frequently appears when roots are already sitting too wet, meaning the fix is usually more oxygen and more light, not more water.
Clues that point toward normal leaf aging
- Only the lowest, oldest leaf yellows at a time, while newer leaves remain firm and evenly colored.
- Yellowing is slow, with no mushy stems, no foul soil smell, and no rapid spread across the plant.
- Growth continues, even if it is modest, and the plant looks stable overall.
Clues that point toward overwatering or slow drying
- The pot feels heavy and wet several days after watering, especially in cooler or dimmer seasons.
- Yellowing appears alongside drooping, soft stems, or a dull leaf surface that looks tired rather than thirsty.
- The soil stays damp on top for a long time, suggesting poor airflow or an overly dense mix.
Gentle steps to try when yellowing likely comes from too much water
- Pause watering until the soil dries to the appropriate depth for your plant type, because roots need oxygen to recover and rebuild function.
- Move the plant to brighter indirect light, because better light increases water use and supports healing.
- Empty any saucer after watering, because standing runoff keeps the root zone wet longer than you realize.
- Remove fully yellow leaves, because they rarely recover and they can invite decay as they break down.
- Watch new growth rather than old damage, because recovery shows up in the next leaves first.
Gentle steps to try when yellowing likely comes from underwatering or uneven watering
- Water thoroughly until excess drains, because deep watering hydrates the entire root ball instead of just the top layer.
- Soak the pot from below for 20 to 40 minutes if water runs straight through, because dried soil can become water-repellent and needs time to rehydrate evenly.
- Check moisture deeper than the surface before the next watering, because the goal is consistency rather than swinging between drought and flood.
- Reduce harsh sunlight for a day or two after a drought, because stressed leaves can scorch while the plant is recovering water balance.
Drooping leaves: thirsty, suffocating, or simply shocked
Drooping leaves can mean opposite things, because a plant droops when it cannot move water properly, whether the soil is bone-dry or the roots are overwhelmed by constant wetness.
Dry-soil droop often comes with lightweight pots and a soft limpness that improves quickly after proper watering, while wet-soil droop often looks tired and sluggish even though the pot feels heavy.
Sudden droop after moving a plant can be shock, because changes in light and temperature can temporarily reduce transpiration balance even when watering is fine.
Fast checks that separate the most common droop causes
- Lift the pot to judge weight, because light usually means dry soil and heavy usually means wet soil.
- Feel the soil a couple inches down, because the surface can mislead you in either direction.
- Look for droop timing, because droop right after a move or after a cold night often points to shock rather than watering error.
Gentle rescue steps for drooping with dry soil
- Water slowly and deeply, because fast pouring can channel through cracks and leave the center dry.
- Use bottom watering when the soil is stubborn, because a slow soak helps the mix absorb moisture again.
- Allow full drainage, because oxygen matters even during a rescue watering.
- Move away from vents and heaters temporarily, because dry airflow increases leaf water loss during recovery.
Gentle rescue steps for drooping with wet soil
- Stop watering immediately, because adding more moisture worsens oxygen deprivation around roots.
- Increase indirect airflow near the pot, because evaporation helps the root zone regain oxygen without blasting leaves.
- Check drainage holes for blockage, because compacted roots and clogged holes can trap water in the base.
- Delay repotting unless decline is rapid, because many plants recover with drying and improved light before a disruptive root inspection is needed.
Brown tips and crispy edges: the three most common causes in apartments
Brown tips and crispy edges are frustrating because they look like failure, yet they are often just the plant’s way of marking where stress accumulates first.
Low humidity, mineral buildup, and inconsistent watering are the most common triggers, and you can usually confirm them with a few simple observations instead of guessing.
Old crisping does not reverse, so the real win is preventing new damage, which is why you should watch the next leaves rather than obsess over the old ones.
Confirming low humidity without overthinking it
- Dry air is likely when heating or air-conditioning runs often and leaf tips worsen during those periods.
- Humidity stress is more common on thin-leaved tropical plants than on thick-leaved plants, even in the same room.
- Draft exposure matters, because constant moving air strips moisture from leaves more aggressively than still air.
Confirming mineral buildup as a contributor
- White crust on soil or pot rims suggests accumulated minerals from hard water or frequent fertilizer use.
- Tip burn that appears after feeding often signals the plant is sensitive, especially if growth slowed at the same time.
- Soil that never gets a thorough flush can hold salts, because partial watering leaves minerals behind as water evaporates.
Gentle steps that reduce new crisping
- Trim brown tips with clean scissors, following the natural leaf shape so the cut looks tidy rather than choppy.
- Water thoroughly when it is time, because deep watering reduces salt concentration and hydrates evenly.
- Improve humidity modestly through grouping plants or using a local humidity tray, because stability beats extremes for most homes.
- Keep plants away from direct vent airflow, because airflow control is often the simplest fix with the biggest payoff.
Spots, blotches, and weird discoloration: what’s urgent and what’s cosmetic
Leaf spots can come from sun scorch, pests, mechanical damage, or disease pressure, and the calm approach is to decide whether spots are spreading quickly or staying stable.
Stable marks that do not expand often reflect past stress, while expanding spots suggest an active issue that needs better airflow, drier foliage, and removal of the worst leaves.
Wet leaves in cool rooms are a common setup for spotting, so watering the soil rather than the leaves is one of the safest preventive habits you can adopt.
Spot patterns and what they often suggest
- Bleached or tan patches near a window often indicate sunburn after a sudden jump in light intensity.
- Dark spots that increase in number during humid, stagnant conditions can suggest disease pressure, especially when leaves stay wet.
- Speckling paired with fine webbing frequently signals mites rather than fungus, especially in dry air.
- Random tears and scars can be physical damage from handling, pets, or leaf rubbing against furniture.
Gentle spot-response plan for beginners
- Remove the worst affected leaves if spots are spreading, because reducing compromised tissue lowers pressure on the plant.
- Keep foliage dry, because many spot issues worsen when moisture sits on leaves for long periods.
- Increase airflow indirectly, because a gentle fan across the room helps without turning the plant into a wind tunnel.
- Stabilize light exposure, because dramatic light swings can weaken leaf tissue and invite additional damage.
Plant pests: the calm inspection routine that catches trouble early
Plant pests are common indoors because conditions are steady and predators are absent, which means a small hitchhiker can become a real problem if it goes unnoticed for weeks.
Early detection is the easiest path, so a quick weekly scan is more powerful than any complicated treatment plan you try only after things are already intense.
Isolation is your best friend, because separating one suspect plant protects the rest of your collection while you confirm what you are dealing with.
Where pests hide when everything looks fine from above
- Leaf undersides, where sap is accessible and the surface is protected from casual glances.
- Stem nodes and leaf joints, where insects wedge into creases and avoid removal.
- New growth tips, where tissue is tender and nutrient-rich.
- Pot rims and soil surface, especially when fungus gnats are involved.
Common indoor pest clues you can spot without special tools
- Spider mites often create fine webbing and dusty-looking stippling, especially during dry, heated months.
- Mealybugs look like tiny cotton clusters near nodes and stems, and they can spread quietly from plant to plant.
- Scale insects resemble small bumps that cling to stems and veins, often staying put while they feed.
- Aphids gather around soft new growth, sometimes leaving sticky residue that feels like a spill you cannot find.
- Fungus gnats appear as tiny flies near soil, often indicating soil that stays wet too long.
Gentle first-response steps when pests are suspected
- Isolate the plant, because containment reduces the size of the problem immediately.
- Rinse foliage with lukewarm water if the plant tolerates it, because physical removal lowers pest numbers fast.
- Wipe stems and leaf undersides with a soft cloth, because many pests lose their grip with simple friction.
- Remove heavily infested leaves, because saving a few damaged leaves is rarely worth risking the entire plant.
- Repeat inspections every few days, because pests have life cycles and one cleaning rarely ends the story.
Mold on soil and fungus gnats: annoying, common, and usually fixable
Soil mold usually means the surface stays damp with limited airflow, and while it looks alarming, it is often a symptom of conditions rather than a sign your home is doomed.
Fungus gnats thrive in consistently moist soil, so their presence is frequently a feedback signal that the mix is staying wet longer than the plant can use.
Balancing surface dryness with root-zone hydration is the sweet spot, because extremes invite either gnats or drought stress, and neither feels good to manage.
Gentle steps that reduce mold and gnats without harsh measures
- Let the top layer dry a bit more between waterings, because larvae prefer consistently damp surfaces.
- Increase airflow around the pot, because evaporation discourages mold growth and speeds drying.
- Remove and replace the top inch of soil if it is heavily moldy, because you are removing the visible colony and its immediate food source.
- Use bottom watering occasionally, because it keeps the surface drier while still hydrating roots.
- Clean saucers and nearby spills, because damp debris can maintain a gnat-friendly environment even when you improve watering.
Signs your mold or gnat situation is improving
- Fuzzy patches stop returning quickly after you adjust drying and airflow.
- Fewer gnats appear near the soil line after a couple watering cycles.
- Soil dries more evenly rather than staying wet on top and dry underneath.
Slow growth, leggy stems, and “nothing is happening” for months
Slow growth can be normal during seasonal changes, yet long-term stagnation often points to low light, compacted soil, or root crowding that limits water and nutrient uptake.
Leggy growth with wide gaps between leaves usually means the plant is reaching for more light, because it is stretching to survive rather than growing dense and strong.
Root-bound plants can also stall because the soil volume dries unevenly and roots circle tightly, reducing the plant’s ability to refresh itself with healthy new root tips.
Fast checks when growth is slow
- Compare the plant’s location to the brightest parts of your home, because many “bright” spots are actually moderate or dim for plants.
- Look for elongated stems and small leaves, because reaching behavior suggests a light bottleneck.
- Peek at drainage holes for roots, because roots escaping the base often signal crowding.
Gentle growth-boost steps that keep stress low
- Move the plant to brighter indirect light, because more energy supports healthier growth without the scorch risk of harsh sun for many species.
- Rotate weekly, because even exposure prevents leaning and improves overall structure.
- Refresh watering consistency, because stable moisture supports steady root activity.
- Plan repotting if roots are tightly circling, because fresh mix and slightly more space can restart growth without a dramatic jump in pot size.
Leaf drop: when it’s normal, when it’s stress, and what to do first
Leaf drop can be normal when a plant sheds older leaves, yet sudden leaf drop often signals stress from drafts, light changes, underwatering, or root issues that reduce the plant’s ability to support its canopy.
Changes in location are a frequent trigger, because plants adapt to a specific light pattern, and a sudden shift can cause them to abandon leaves that no longer “pay for themselves.”
Repeated leaf drop combined with yellowing and wet soil strongly suggests root stress, which means your first goal becomes improving oxygen and drying patterns.
Leaf-drop triage questions
- Did the plant move recently, especially farther from a window or closer to a vent?
- Are dropped leaves mostly older leaves, or is new growth dropping too?
- Does the pot smell sour or stay heavy for many days after watering?
Gentle steps that reduce stress-related leaf drop
- Stabilize the location, because constant moving delays adaptation and makes the problem worse.
- Remove drafts from vents and doors, because airflow can dehydrate leaves and trigger shedding.
- Adjust watering based on soil checks, because leaf drop often improves when roots are in a consistent oxygen-and-moisture balance.
- Avoid fertilizing until the plant stabilizes, because stressed roots can burn and leaf drop can accelerate.
Light problems that look like “mystery illness”
Low light can cause yellowing, droop, and slow growth, while harsh direct light can scorch leaves, and both scenarios can look like a disease if you do not connect symptoms to placement.
Bright indirect light is a safe default for many houseplants, because it gives energy without the intense heat and intensity that can damage leaves through glass.
Sudden light changes are more stressful than imperfect light, so gradual transitions are kinder and more likely to succeed for beginners.
Signs light may be too low
- Long gaps between leaves on new growth, creating a stretched appearance.
- Small new leaves, pale color, and slow or stalled growth even during warmer months.
- Soil staying wet longer than expected, because low light reduces water use.
Signs light may be too strong
- Bleached patches, crisp tan spots, or leaf edges that look sunburned after a move closer to a window.
- Leaves curling away from intense light, especially during midday.
- Soil drying extremely fast in direct sun, increasing watering pressure.
Gentle light adjustments that avoid shock
- Change the plant’s location in small steps over several days, because gradual adaptation reduces leaf loss.
- Rotate weekly, because balanced exposure prevents leaning and uneven stress.
- Keep plants out of direct vent airflow, because good light cannot compensate for constant leaf dehydration.
Watering mistakes that imitate almost every other problem
Watering issues can masquerade as pest damage, nutrient problems, and light problems, because stressed roots cannot support leaves reliably no matter what else you do.
Overwatering is usually “too frequent for the current conditions,” not “too much at once,” which is why winter and low-light rooms create trouble so easily.
Underwatering is often uneven hydration rather than simple forgetfulness, especially when soil becomes compacted or water-repellent and moisture cannot spread through the root ball.
A safer watering rhythm for beginners who want less drama
- Check moisture before watering, because your calendar does not know your room’s light and temperature.
- Water thoroughly when it is time, because deep watering supports deep roots and more stable growth.
- Let excess drain completely, because standing water removes oxygen and invites root stress.
- Adjust for season and location, because a plant in winter shade uses water far more slowly than a plant in summer brightness.
Common signs your soil or pot setup is working against you
- Water runs through immediately and the soil stays dry in the middle, suggesting hydrophobic or compacted mix.
- The top stays wet for days while the plant looks thirsty, suggesting poor aeration or root issues.
- The pot has no drainage holes, creating a “guessing game” that beginners rarely win consistently.
Common indoor plant problems: a gentle decision tree you can follow tonight
Structure reduces anxiety, so this troubleshooting guide gives you a clear path when you are standing there with a sad plant and too many opinions in your head.
Progress often begins with “no longer getting worse,” and that outcome deserves credit, because stabilization is the first stage of recovery.
The step-by-step troubleshooting flow
- Inspect for pests on leaf undersides and stem joints, then isolate the plant if anything looks suspicious.
- Check soil moisture a few inches down, then decide whether the plant needs drying time or deep watering.
- Confirm drainage and remove standing runoff, because roots recover faster when oxygen returns.
- Evaluate light and drafts, then relocate gently if the spot is clearly too dim, too harsh, or too windy.
- Remove only dead or collapsing leaves, because cleanup reduces stress without reducing too much photosynthesis capacity.
- Wait several days while keeping the one-change rule, because plants need time to show you the result.
What to write down so you stop guessing next time
- The date you watered and whether the pot drained freely.
- Where the plant sits relative to the brightest window and any vents.
- Which leaves changed first, older or newer, and how fast the change spread.
- Whether pests were seen, and where they clustered if they were present.
When to seek specialized help, because some situations truly are serious
Severe decline can involve advanced root rot, systemic infection, environmental hazards, or pest infestations that overwhelm a beginner’s comfort zone, and asking for experienced eyes early can save time and plants.
Support can come from local plant specialists, reputable nurseries, or knowledgeable horticulture communities, especially when you bring clear photos and notes about watering, light, and timing.
Home safety matters too, so if you suspect extensive mold in your living space or a persistent air-quality issue, prioritizing the environment is more important than saving one plant.
Clear signs it’s time to get experienced help
- Rapid collapse across the whole plant within days, especially when the stem base feels soft or hollow.
- Strong foul odors from soil, blackened roots, or mushy crown tissue that worsens quickly.
- Pests that return aggressively despite repeated cleaning, isolation, and routine inspections.
- Leaf spots that expand daily across many leaves, suggesting an active issue rather than old damage.
- Multiple plants declining at once, suggesting a shared environment problem like light, water quality, temperature swings, or draft exposure.
Final reassurance for beginners who feel behind
Every plant owner has a “nearly dead” moment, and the people who get good at plants are simply the ones who learn to observe calmly, adjust gently, and give the plant time to respond.
Building two habits, soil-check watering and weekly pest scanning, prevents most common indoor plant problems before they turn into late-night emergencies.
This content is independent and has no affiliation, sponsorship, or control by any entities mentioned.