Dry apartment air can quietly wreck indoor plants, especially when air-conditioning or heating runs for hours without a break.
Practical humidity control is completely doable, and the goal is steady comfort for leaves and roots rather than dramatic, risky swings.
humidity tips for indoor plants: why humidity matters more than most people think
Humidity is the invisible part of plant care that decides whether leaves stay flexible and hydrated or slowly crisp at the edges while everything else looks “fine.”
Water leaves a plant through tiny openings, and low humidity pulls that moisture out faster, which forces the plant to protect itself instead of growing.
Faster moisture loss can show up as brown tips, curled edges, stalled new leaves, and flowers that drop early, even when watering feels consistent.
Apartment life makes the problem more common because sealed windows, AC vents, and heaters create microclimates that repeat day after day in the same spots.
Healthy humidity is not about turning your home into a jungle fog machine, because excess moisture can invite mold, fungus gnats, and leaf-spot issues.
This content is independent and has no affiliation, sponsorship, or control by any entities mentioned.
dry air problems: how to recognize low humidity without guessing
Brown tips are a classic clue, yet the same symptom can also come from mineral buildup, strong sunlight, fertilizer burn, or inconsistent watering, so patterns matter.
New leaves that emerge wrinkled or fail to unfurl smoothly often point to dry air, because tender growth needs stable moisture in the air to expand properly.
Leaf edges that feel crisp, papery, or slightly curled inward can signal moisture loss that is happening faster than roots can replace it.
Flower buds that dry up before opening, or blooms that last a fraction of their usual time, frequently reflect stress from a dry environment.
Repeated leaf drop from the lower canopy can be a survival move, because the plant reduces leaf area to slow down water loss.
Static shocks, dry throat in the morning, and irritated skin are human clues that often match what your plants are experiencing in the same room.
Fast plant symptoms checklist
- Brown tips or browned margins that keep returning after pruning.
- Leaf curl that increases when AC or heating runs longer.
- Small, tough new leaves that look underdeveloped.
- Slow growth even during the brighter months.
- Buds that drop early or flowers that fade quickly.
Fast room symptoms checklist
- Frequent static electricity when you touch fabrics or doorknobs.
- Dry lips, dry sinuses, or a scratchy throat in the morning.
- Air that feels “thin” or tight, especially overnight with a heater.
- Plants nearest vents looking worse than the same species elsewhere.
What “good humidity” means for indoor plants, without overcomplicating it
Most tropical houseplants feel happiest when indoor humidity stays moderate and stable, rather than swinging from very dry to very humid from one day to the next.
Consistency helps leaves regulate transpiration, which reduces stress and makes watering schedules easier because the plant is not constantly panicking.
Some plants tolerate dryness better, including many succulents and cacti, but even they can struggle if hot, dry airflow hits them directly for hours.
Ferns, calatheas, many aroids, and thin-leaved plants tend to show low-humidity stress sooner, which makes them useful “indicator plants” in your collection.
A simple hygrometer can confirm trends, yet observation is still valuable because two rooms can differ dramatically even inside the same apartment.
Start with the easiest win: stop the dry airflow from blasting your plants
Direct airflow is often the real villain, because moving air strips away the thin, humid layer that naturally forms right around the leaf surface.
Relocating a plant just a few feet from a vent can reduce moisture loss more than any gadget you buy, especially if the plant was in the direct line of flow.
Ceiling fans on high can also increase drying, so lowering fan speed near plant shelves often helps without changing your comfort.
Heaters create a similar effect, and plants placed above or beside a heat source tend to dry quickly while their pots stay deceptively cool.
Quick placement rules that prevent unnecessary stress
- Move plants out of direct vent paths, even if the light is perfect there.
- Avoid placing plants on top of radiators, space heaters, or heat-register shelves.
- Keep delicate plants off high, hot shelves where warm air collects.
- Create a buffer zone using furniture so airflow is diffused before it reaches leaves.
- Rotate plants weekly if one side faces a draft that cannot be eliminated.
humidity tips for indoor plants: measure first, then choose your strategy
Chasing humidity without a baseline can lead to overwatering, because many people mistakenly treat dry air problems as a watering problem.
A basic hygrometer lets you compare rooms and identify the worst zones, which is especially helpful if your bedroom and living room behave differently.
Morning readings can differ from afternoon readings, so checking at consistent times reveals whether dryness is constant or tied to heating cycles.
Once you see the pattern, you can match the fix to the severity, because mild dryness needs a gentle approach while extreme dryness may need a humidifier.
A simple decision guide you can follow
- Mild dryness with minor leaf tip browning often responds to grouping and humidity trays.
- Moderate dryness with curled leaves may need a room humidifier plus better placement.
- Severe dryness with repeated damage usually requires a humidifier, draft control, and a review of watering consistency.
Humidity trays explained: the practical “humidity trays” method that actually makes sense
Humidity trays work by increasing moisture in the air directly around the plant as water evaporates from a shallow tray under the pot.
The most common version uses pebbles or stones to keep the pot above the water line, which prevents the roots from sitting in water.
Results are localized, which is perfect for apartment living because you can boost humidity for a small group of plants without changing the whole room.
Humidity trays are also low risk when set up correctly, because they do not add mist directly to leaves and they do not create wet surfaces on foliage.
Step-by-step: build a humidity tray that stays safe and clean
- Choose a tray wider than the pot so evaporation happens over a meaningful surface.
- Add clean pebbles or stones to create a stable platform above the water line.
- Pour water until it sits just below the top layer of pebbles.
- Set the pot on the pebbles so drainage holes never touch standing water.
- Top off water as it evaporates, and rinse the tray regularly to avoid buildup.
Common humidity tray mistakes to avoid
- Letting the pot sit in water, which can suffocate roots and trigger rot.
- Using a tray that is too small, which evaporates quickly with minimal benefit.
- Ignoring mineral crust, which can reduce evaporation and look messy over time.
- Allowing algae to grow, which signals the tray needs cleaning and better light control.
Grouping plants: the “quiet” way to increase humidity with almost no equipment
Grouping plants works because a cluster of leaves releases moisture into the shared air pocket, which creates a slightly more humid microclimate.
Transpiration from several plants adds up, so even a small grouping can soften dryness around sensitive plants like ferns and many aroids.
Spacing still matters, because leaves pressed tightly together reduce airflow and can encourage fungal issues, especially if the room is already humid.
A good grouping feels like a loose neighborhood rather than a packed crowd, and you want air to move gently through the leaves.
How to group plants without increasing pest or fungus risk
- Place the most humidity-loving plants near the center of the cluster.
- Leave small gaps between pots so air can circulate and leaves can dry after watering.
- Keep plants with known pest issues slightly separated until they are fully stable.
- Elevate a few pots on stands so leaves overlap at different heights rather than cramming together.
- Inspect the cluster weekly because grouped plants make early pest detection more important.
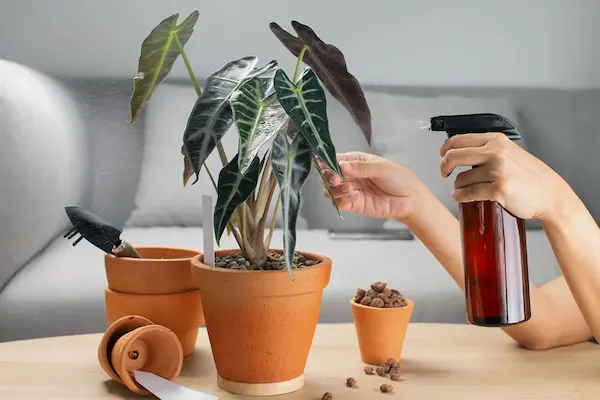
indoor plant misting: when misting helps, when it’s mostly a myth, and how to do it safely
Misting is popular because it feels immediate, yet the humidity boost is usually short-lived in a typical apartment with airflow and climate control.
Light misting can be useful for cleaning dust off leaves or briefly easing dryness during the hottest part of the day, especially in still air.
Heavy misting that leaves water sitting on leaves for long periods can encourage fungal spots, particularly for plants with textured foliage or tight crowns.
Success with indoor plant misting depends on timing, droplet size, and ventilation, because leaves should not remain wet for hours.
Safe misting rules for cautious plant owners
- Mist in the morning so leaves can dry naturally before evening.
- Use a fine sprayer to avoid big droplets that bead and linger.
- Avoid misting fuzzy leaves, because trapped moisture can lead to spotting.
- Skip misting in cool rooms where evaporation is slow and dampness lingers.
- Never mist to compensate for underwatering, because roots still need consistent moisture.
A practical alternative to frequent misting
Leaf wiping with a damp microfiber cloth improves photosynthesis by removing dust, and it avoids leaving random droplets that can spot leaves under bright light.
A weekly wipe also forces you to inspect pests and leaf texture changes, which is a major advantage when your apartment air is already stressing plants.
Humidifiers: the most reliable way to increase humidity, with apartment-friendly safety
A room humidifier is the most consistent tool for increasing humidity, because it can raise the background moisture level rather than relying on tiny microclimates.
Choosing the right approach matters, because too much humidity can cause condensation on windows and encourage mold growth on walls or ceilings.
Safety matters even more, because water plus electricity demands cautious placement, stable cords, and a routine that prevents spills.
A humidifier also works best when paired with airflow control, because vents can undo your effort by drying the room immediately after moisture is added.
How to choose a humidifier without getting overwhelmed
- Pick a size that matches your room, because underpowered units run nonstop with little effect.
- Favor models that allow easy cleaning, because hygiene is non-negotiable for indoor air quality.
- Use a built-in humidistat when possible, because it helps prevent accidental over-humidifying.
- Consider noise level if it will run at night, because consistent use beats perfect specs.
Electrical safety checklist for humidifier use near plants
- Place the humidifier on a stable, water-resistant surface that cannot wobble.
- Keep the unit away from plant shelves where drips can land on cords or outlets.
- Route cords so they do not cross walkways, because a trip can create a spill hazard.
- Plug into a properly grounded outlet, and avoid daisy-chaining power strips.
- Refill the tank carefully over a sink, and wipe the base dry before powering on.
How to avoid the “too much humidity” trap that causes mold and leaf issues
Adding humidity is helpful only when it stays in a safe range, because very high humidity can trigger mold on soil surfaces and reduce leaf drying after watering.
Condensation on windows is a warning sign, because it means moisture is collecting on cool surfaces, and that same moisture can feed hidden mold growth.
Stagnant air combined with warm temperatures creates a perfect environment for fungal spores, especially in dense plant clusters.
Balanced humidity feels comfortable, while excessive humidity feels clammy, and your senses can be a useful cross-check alongside measurements.
Signs you may be overdoing humidity
- Water droplets forming on windows, mirrors, or cold walls for long periods.
- A musty smell that appears after the humidifier runs overnight.
- Soil staying wet longer than usual even though your watering routine did not change.
- New fungal spots on leaves, especially on plants with dense foliage.
How to correct excessive humidity without abandoning the plan
- Lower the humidifier output and aim for steadiness rather than peaks.
- Run a fan on low in the room, but keep it from blowing directly onto plants.
- Increase spacing between plants so leaves dry after watering.
- Open a window briefly if outdoor conditions allow, because fresh exchange can reset the room.
- Clean the humidifier and check for stagnant water in trays or saucers.
Watering and humidity: the connection that prevents confusing “mixed signals”
Low humidity makes soil dry faster on the surface, yet the deeper root zone might still be moist, which can trick you into watering too often.
Root health controls how well a plant can respond to dry air, because strong roots move water upward efficiently and reduce stress on leaves.
Overwatering can cause roots to rot, and then leaves look thirsty even when the pot is wet, which can lead to even more watering and faster decline.
A moisture meter can help, yet the simplest method is checking soil a few inches down and watering only when that zone reaches the right dryness for the species.
Practical watering adjustments for dry air without overwatering
- Water deeply and less often, because shallow watering trains roots to stay near the surface.
- Use pots with drainage holes, because humidity fixes do not replace good drainage.
- Empty saucers after watering, because standing water invites gnats and root problems.
- Adjust watering frequency seasonally, because heating months often change drying patterns.
Humidity tips by plant type: choose the tactic that fits the leaf
Different plants show dryness differently, so matching the method to the plant type saves time and avoids creating new problems.
Thin-leaved tropical plants often benefit most from stable room humidity plus grouping, while thick-leaved plants may only need draft control.
Plants with delicate new growth can respond well to a humidity tray and a humidifier, because those options stabilize air moisture without wetting leaves directly.
Plants that usually appreciate a stronger humidity strategy
- Calatheas and marantas that curl or crisp easily in dry rooms.
- Ferns that drop fronds when air gets dry overnight.
- Many aroids with large, thin leaves that show edge browning quickly.
- Orchids that stall growth when humidity is inconsistent, depending on the type and setup.
Plants that often tolerate lower humidity but still hate drafts
- Snake plants and many succulents that prefer dry soil but dislike cold AC blasts.
- Pothos and philodendrons that adapt well yet show stress near vents.
- ZZ plants that survive dryness but can drop leaflets under repeated hot airflow.
humidity tips for indoor plants: a simple 7-day reset plan for dry apartments
A short, structured reset keeps you from changing five variables at once, which is the fastest way to get confused and lose confidence.
This plan focuses on the safest steps first, because placement and airflow fixes cost nothing and reduce stress immediately.
Day-by-day plan
- Day 1: Identify vents and drafts, then move sensitive plants out of direct airflow.
- Day 2: Group compatible plants loosely to create a shared microclimate without crowding.
- Day 3: Build one humidity tray for your most sensitive plant and monitor its response.
- Day 4: Check soil moisture deeper in pots, and correct overwatering or underwatering patterns.
- Day 5: Add a hygrometer reading routine, then compare morning and evening numbers.
- Day 6: If dryness remains moderate to severe, introduce a humidifier with a conservative setting.
- Day 7: Reassess leaf texture, new growth, and tip browning, then keep only what clearly helps.
How to keep humidity improvements low-maintenance, because life is busy
A sustainable routine beats a perfect routine, and your plants will respond better to small consistent habits than to occasional heroic interventions.
Weekly tray cleaning prevents odor and buildup, while monthly humidifier cleaning prevents bacteria and keeps output steady.
Seasonal changes matter, because heating season and cooling season often produce different dryness patterns even in the same room.
Low-effort maintenance checklist
- Refill humidity trays as needed, and rinse them on a predictable schedule.
- Wipe leaf surfaces weekly if dust accumulates, especially near windows and vents.
- Empty standing water from saucers after watering to prevent gnats and root stress.
- Clean humidifier tanks and bases regularly so the room air stays fresh.
- Re-check plant placement whenever furniture changes, because airflow patterns shift easily.
Common myths that waste time in dry-air plant care
Many people assume misting alone solves dryness, but the effect is typically brief, and the risk rises if leaves remain wet for too long.
Some plant owners think more watering will fix crisp tips, yet root issues and overwatering can worsen the symptoms in ways that look like dryness.
Others assume all plants need the same humidity, even though leaf thickness, stomata behavior, and growth speed change how each plant responds.
Another myth is that a tiny tray under one pot will humidify an entire room, because the impact is usually local and best used strategically.
What to do instead of chasing myths
- Prioritize draft control first, because it removes the strongest drying force.
- Use humidity trays and grouping for localized improvements around sensitive plants.
- Choose a humidifier only when the room baseline is consistently too dry.
- Keep watering consistent and verify soil moisture before adjusting frequency.
Troubleshooting: if you tried everything and leaves still crisp
Persistent crisping can mean the plant is still in a draft you did not notice, such as airflow bouncing off a wall or circulating from a ceiling fan.
Mineral buildup from hard water or over-fertilizing can also burn leaf tips, which looks similar to low humidity stress from a distance.
Pot-bound roots can limit water uptake, which makes dry air feel harsher because the plant cannot replace lost moisture quickly enough.
Hidden pests like spider mites thrive in dry environments and can cause stippling, dullness, and leaf drop that may be mistaken for humidity issues.
Practical troubleshooting steps
- Check for drafts by holding your hand near leaves during AC or heating cycles.
- Inspect undersides of leaves for fine webbing or speckled damage that suggests mites.
- Review fertilizing frequency, because excess salts can mimic dryness damage.
- Consider repotting if roots circle tightly and water runs through too quickly.
- Confirm humidity readings at plant height, because shelf height changes the numbers.
What “success” looks like, so you know you’re on the right track
Improved humidity usually shows up as smoother new leaves, less curling, and fewer new brown tips, even if old damage remains.
Plants rarely reverse existing crisp edges, so the best indicator is the quality of new growth over the next few weeks.
Watering often becomes more predictable, because leaves lose moisture more slowly and the plant is not cycling between stress and recovery.
Growth can resume in subtle ways first, including tighter internodes, steadier leaf size, and stronger color, especially in plants that had stalled.
Clear signs your plan is working
- New leaves open more easily and look less wrinkled.
- Leaf edges stay flexible rather than crunchy after a full week of AC use.
- Soil moisture dries more evenly instead of flipping between soggy and bone-dry.
- Plants stop shedding leaves as frequently, particularly in the lower canopy.
Final reminders for cautious, practical plant owners
Humidity fixes work best when they are layered thoughtfully, because a humidifier plus draft control plus good watering habits beats any single trick.
Small microclimate strategies like humidity trays and grouping are ideal for apartments, since they target the plants that need help without turning your whole home into a damp zone.
Electrical safety should never be optional, so keep water sources stable, cords tidy, and outlets protected from splashes at all times.
Patience pays off because plants respond to improved conditions over weeks, and steady new growth is the real proof that your humidity tips are doing their job.
This content is independent and has no affiliation, sponsorship, or control by any entities mentioned.